Deck Joist Spacing & Blocking
Our project experts take you step-by-step. When you’re ready to build, download the free project guide.
When it comes to deck joist spacing and installation, having a structurally sound foundation is critical.
BEFORE YOU BEGIN, make sure your new or existing framing is structurally sound. Lock down other important considerations, like deck size, railing, and more. Please consult all appropriate installation guides.
Design Considerations Before You Build Your Deck
Deck Size
Before you know how to execute deck joist spacing and blocking on your DIY project, you’ll need to know the size of your deck and the amount of building material you’ll need. Make sure you’ve calculated for all necessary materials.
Railing
Railing installation methods can affect the blocking required for your framing. Choose a TimberTech composite or aluminum railing system to bring a complementary finishing touch to your outdoor living space.
Deck Material
Depending on the deck material and fasteners you select, you may have to add blocking at butt joints or seams. Refer to the appropriate installation guide for the line of TimberTech decking you’ve selected.
Deck Board Patterns
Different deck board patterns may require extra blocking / framing (e.g., picture frame borders or diagonal inlays). Confirm your design and planned orientation of your deck boards before you begin deck joist work.
Deck Joist Spacing & Blocking Tips
Estimated based on a 12′ x 12′ deck; time will vary depending on the size of deck and complexity of the build.
ESTIMATED TIME: 1 Hour
RECOMMENDED MAN-POWER: 1 Person
PREREQUISITES: Secured framing, properly attached to the house, and a confirmed deck design
OVERVIEW
Step 1: Check That Your Deck Frame Is Structurally Sound
Step 2: Run String Lines to Ensure All Joists Are Level & In Plane
Step 3: Make Sure All Joists Are Consistent in Size
Step 4: Make Sure Your Joists Are Spaced Correctly
Step 5: Install Your Blocking
Step 6: Prolong the Health of Your Framing With Joist Tape
Tools You’ll Need
- Safety glasses
- String line (to check that framing is level and in plane across the tops)
- Hammer or mallet
- Replacement lumber if needed (if required, generally at least 2″ x 8″)
- Drill
- Fasteners (exterior-grade fasteners for wood or wood composite decking)
- Miter saw / circular saw
- Tape measure
- Level (4″ minimum)
- TimberTech® PRO-Tac™ Flashing and Joist Tape
Step 1: Check That Your Deck Frame Is Structurally Sound
Before you begin, make sure you’re familiar with the different components of a deck frame.
NOTE: check for any structural damage before you begin building your outdoor living space.
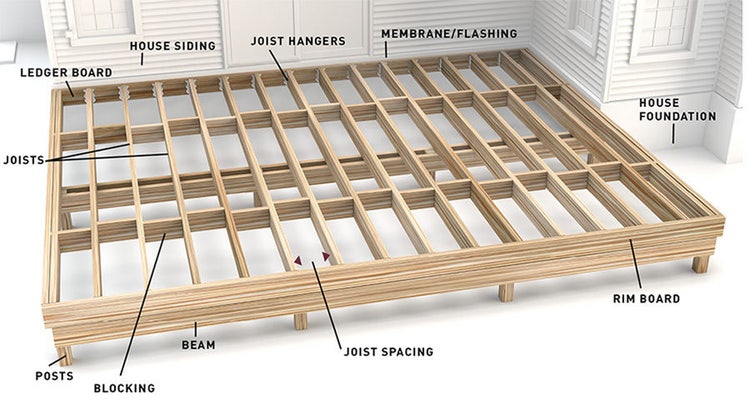
How To Check For Deck Frame Damage
- Check for soft spots, broken pieces, splits, cracks, or damage to the wood from moisture or the elements.
- Look for high/low/uneven joists using a tight string line. Joists must be level and in plane for a flat surface.
- Use a water management system such as a drip cap or flashing wherever framing meets the home to move moisture away from the home and deck.
- Remove any screws or fasteners that may be protruding from the surface of the joist.
- The frame must be securely fastened to the home and/or to a properly secured post and beam frame. Do not build from floating substructures.
- Ensure the framing is held with exterior-grade fasteners; additional exterior-grade fasteners may be required to secure existing framing, as well as fastening reinforcement.
- Inspect framing for contraction of structural lumber and ensure all fasteners are sound and showing no signs of corrosion.
If you are unsure about anything or have questions, contact a professional.
Step 2: Run String Lines to Ensure All Joists Are Level & In Plane
Before installing any decking, run string line frequently to ensure that the tops of the joists are in plane and level.
While a particular joist may be level itself, the top of that joist may still not be in plane with surrounding joists. Joists that aren’t level can result in high or low spots throughout the deck, resulting in a wavy-looking deck. TimberTech decking will conform to the contour of the joists to which it is attached.
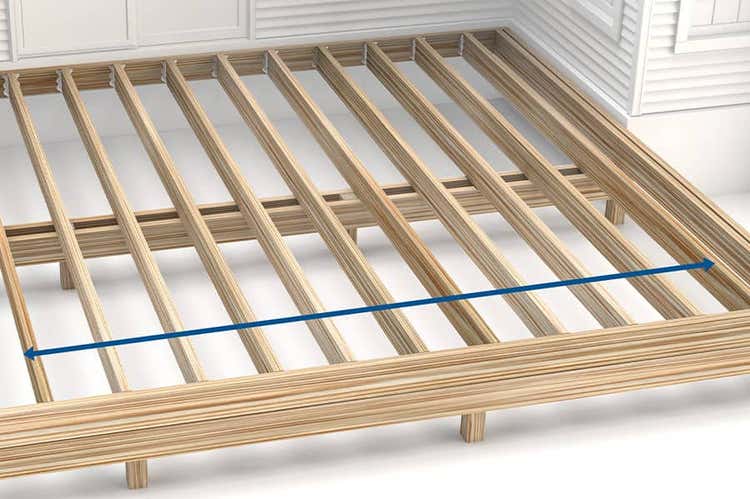
Step 3: Make Sure All Joists Are Consistent in Size
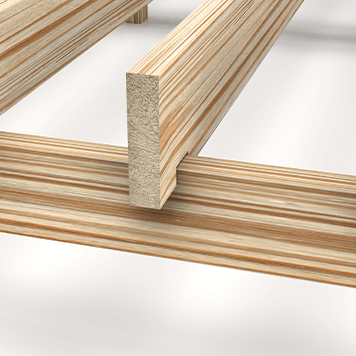
Notching a Joist
A new joist may be slightly wider/ taller than existing joists. Cut a notch in the board to align with the correct height.
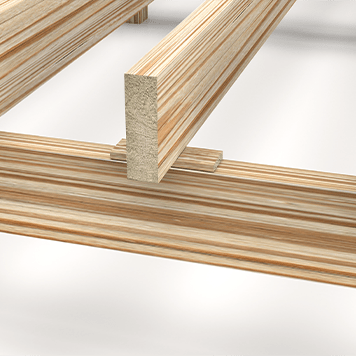
Shimming a Joist
A new joist may be slightly narrower/ shorter than existing joists. Add a moisture-resistant shim to raise it to correct height.
DOUBLE CHECK YOUR LEVELING
Please ensure your joist, blocking, and any added framing are level and in plane with each other.

Solve For
High Joist
- Remove and replace.
- Cut fasteners and lower. Reattach.
- Use a power planer or power sander.
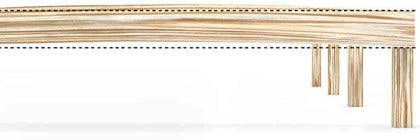
Solve For
Crowned Joist (Up)
- Remove and replace.
- Use a power planer or power sander.
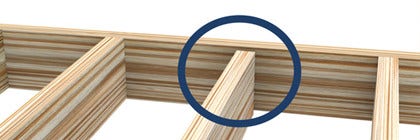
Solve For
Low Joist
- Remove and replace.
- Leave the crowned joist and apply sister joists by sandwiching the board with two new joists.
- Cut fasteners and raise. Reattach.
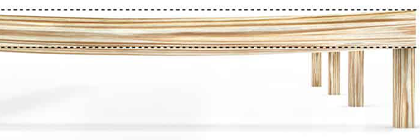
Solve For
Reverse Crowned Joist
- Remove and replace.
- Leave the crowned joist and apply sister joists by sandwiching the board with two new joists.
Step 4: Make Sure Your Joists Are Spaced Correctly
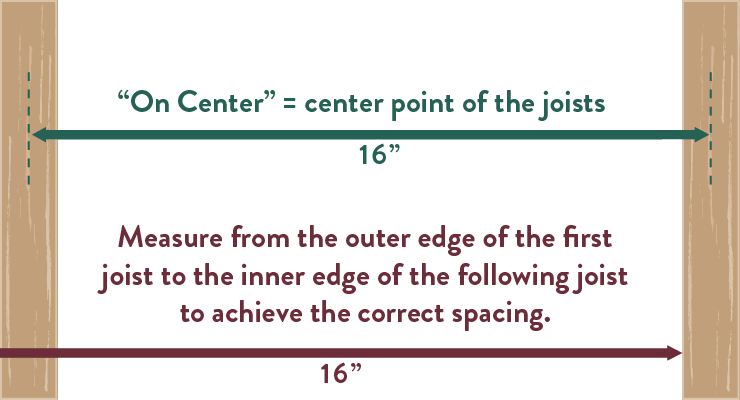
Deck joist spacing should never exceed 16″ on center (with the exception of MAX deck boards, which allow for maximum 24″ on center). For a more rigid feel, 12″ or less may be preferred. If adding additional framing, be sure to keep all boards level and in plane across the tops.
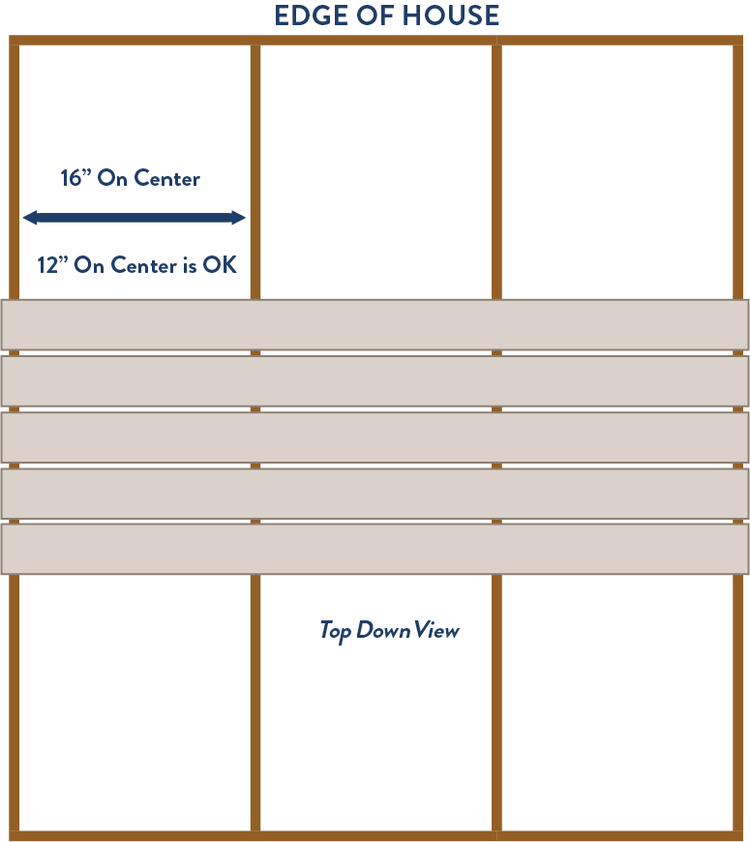
Horizontal Board Placement
Board placement should be 16″ on center.
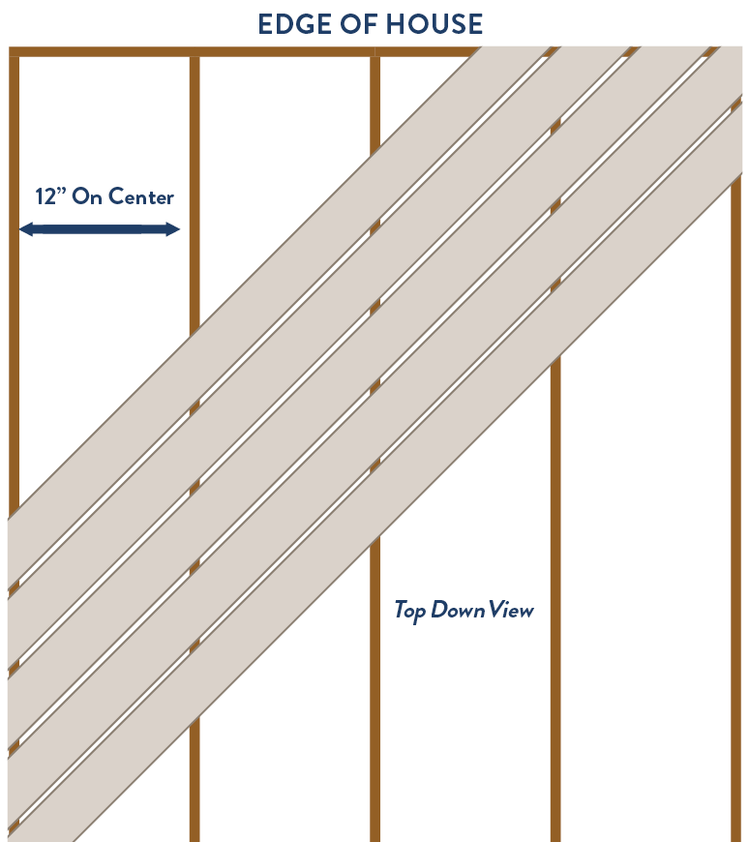
Diagonal Board Placement
Board placement should be 12″ on center.
Step 5: Install Your Blocking

1. Space
Solid wood blocking should be equally spaced in rows, with a maximum of 4′ to 6′ apart.
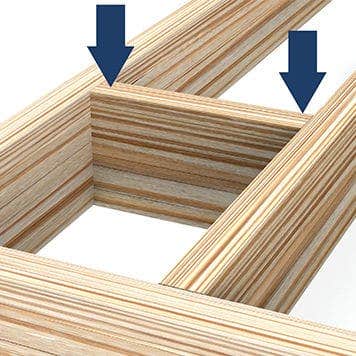
2. Place
Blocking should be installed edge to edge to allow for fastening of the interior blocking.
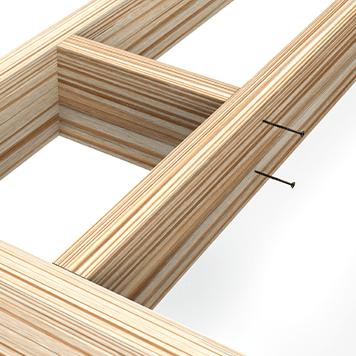
3. Fasten
Use exterior-grade fasteners to fasten through the outside of the joist.
WHY BLOCKING MATTERS Please ensure your joist, blocking, and any added framing are level and in plane with each other.
Step 6: Prolong the Health of Your Framing With Joist Tape
To extend the life of your substructure, prevent water penetration, and protect the joist lumber from rot, apply joist tape.
NOTE: Apply tape to a clean, dry lumber. Try to avoid wrinkles or air bubbles during application.
TAPE WIDTH TO ALLOW FOR OVERHANG ON EACH SIDE
Lock Your Design In & Moisture Out
You’ve laid the foundation – now keep it strong. Banish moisture and protect against rot with all-weather PRO-Tac™ Flashing and Joist Tape.