PVC is a popular high-performance material that’s great for exterior structures, including decking, siding, and trim. Installing PVC trim is similar to working with wood, but it’s even easier because the boards are perfectly uniform, lightweight, and flexible. It’s a great low-maintenance, moisture-resistant choice for your project.
Learn more about PVC trim and tips to install it below.
In This Article:
PVC trim basics
PVC trim and decking is made of polyvinyl chloride plastic with no organic materials. This comes with a few perks, including moisture resistance, increased performance, and low maintenance. Its high durability and moisture resistance make it a great candidate for many exterior applications, including:
- Fascia
- Window trim
- Skirt boards and bands
- Corner boards for siding
- Column wraps
- Stair risers
PVC comes in a variety of colors and even real-wood textures. It can also be heat bent into any shape you like, making it the ultimate material for creative designs.
One consideration to note is that PVC is more costly than many wood species, but it more than makes up for the upfront cost during its lifetime. It’s long lasting and low maintenance, so you don’t need to replace it as often. You can also paint it so that it evolves with your home’s style.
Storage and handling
Store PVC trim on a flat and level surface, and leave its protective covering intact until you’re ready to work with the trim. Keep it out of the sun and cool. Consistent temperatures are ideal and prevent the boards from expanding or contracting during installation.
It’s important to install your PVC trim at the same time that you cut it so changing temperatures don’t affect its size. PVC is more flexible than wood, so ensure that all framing and substructures are flat and level to minimize uneven surfaces.
TimberTech Tip:
Hire a contractor to guarantee a clean, even installation and long-lasting performance.
1. Cut trim to size
You can cut PVC trim and moulding with the same tools used for lumber and composite. Carbide-tipped blades are ideal for both wood and PVC. Avoid fine-toothed metal cutting blades.
You can also choose the saw that works best for you. We recommend power miter saws, but table and circular saws also work.
Follow the same cutting process you would for lumber:
- Measure twice
- Mark your cut with a speed square
- Cut with a saw
If your finished cut has rough edges, you can sand them for a smooth finish. There are a few factors that can cause rough edges, so check for these before your next cut:
- Excessive friction
- Poor board support
- Worn or improper tools
TimberTech Tip:
Scarf joints are stronger and a better choice than butt joints when joining two ends of linear trim.
2. Attach trim
Fastening PVC trim to your framing is as easy as fastening wood trim. You can use corrosion-resistant nails or screws with a minimum length of 1.5 inches, blunt point, and full round head. There are also hidden fasteners like Cortex screws available for a seamless finish.
We recommend #8 trim screws for AZEK Trim and Moulding.
TimberTech Tip:
Watch for and avoid frictional heat buildup while drilling into PVC trim.
When you lay out your trim, try to hide cut ends, and place factory ends front and center. These are typically more polished. You’ll also want to double-check that all of your joints fit together before installing.
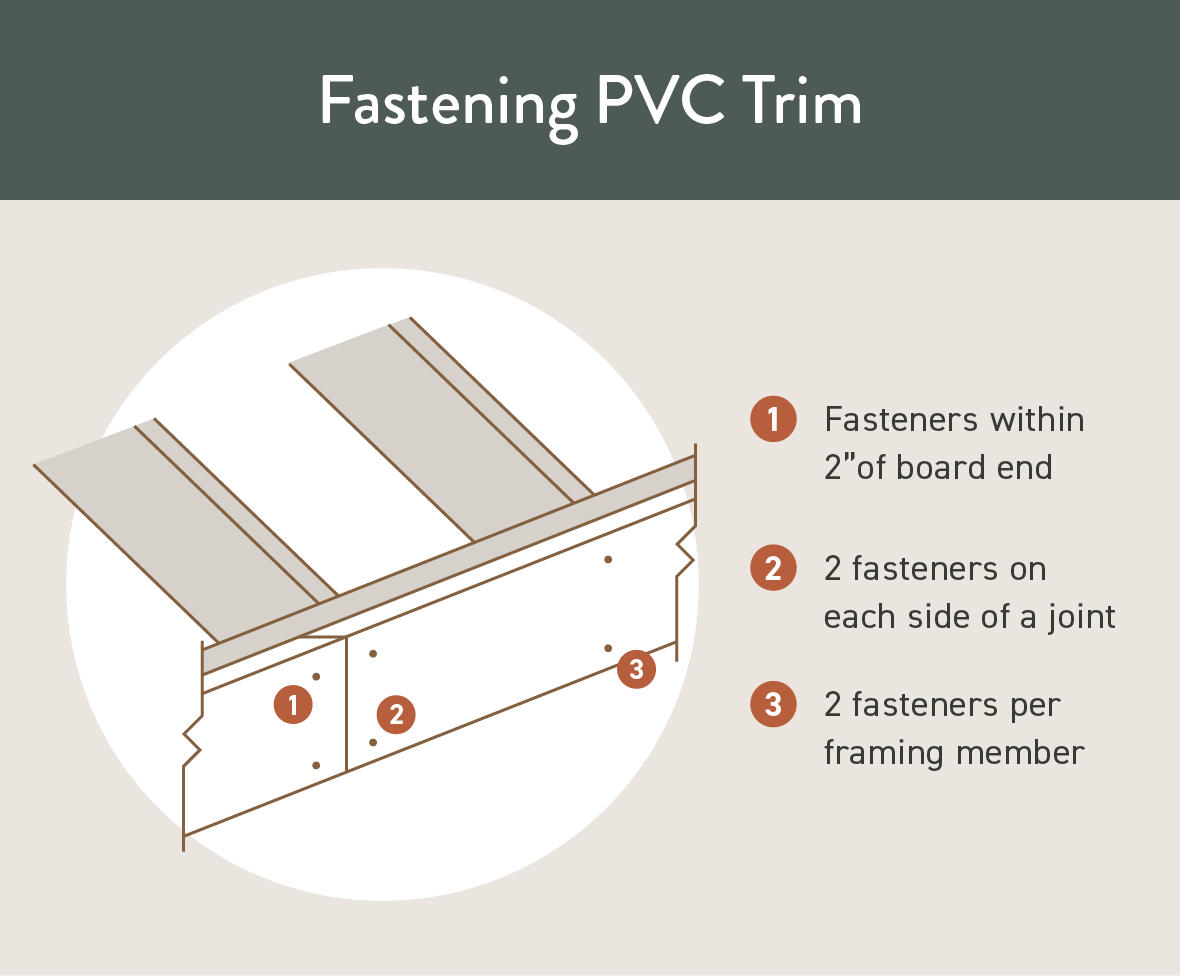
When you’re ready to attach your trim, follow these fastener tips:
- Use two fasteners for every framing member
- Install extra fasteners for trim boards 12″ or wider — don’t exceed 8″ on center
- Install fasteners within 2″ of each board end
- Place two fasteners on each side of a board joint
- All fasteners must hit a solid framing member
Remember that PVC expands and contracts with temperature changes, so you need to account for that when you’re installing trim. You should allow a 1/8″ gap per 18 feet of AZEK Trim and Moulding to accommodate expansion and contraction. It’s also important to glue the ends of joints to prevent separation.
3. Glue PVC trim joints
Cementing is a unique PVC benefit you don’t get with wood. The cement or glue prevents water penetration and reinforces your joints.
First, clean the surfaces you’re gluing and ensure complete contact where the trim connects. When you join two PVC boards, apply a water-based cement adhesive to each end and clamp or screw them together to dry.
Cements offer 5-10 minutes of working time, and full curing takes up to 24 hours.
Tips for a polished finish
While we’ve covered the basic steps to install PVC trim, there are extra steps that can customize your design. These aren’t necessary for a well-installed trim, but they will elevate your project
Route decorative edges and insets

You can route your PVC trim and moulding to define a crisp, clean edge or add a decorative groove to your finish. Standard routers work well. Just like with your saw blades, you should use carbide-tipped router bits for this project.
Heat bend curves

Curved decks or window frames can still sport a high-performance PVC trim. You can heat bend PVC into almost any shape to support a unified aesthetic or create interesting patterns. Heat bending is a specialized treatment that should be left to the professionals. Contact a qualified contractor if you’re interested.
Paint a custom finish
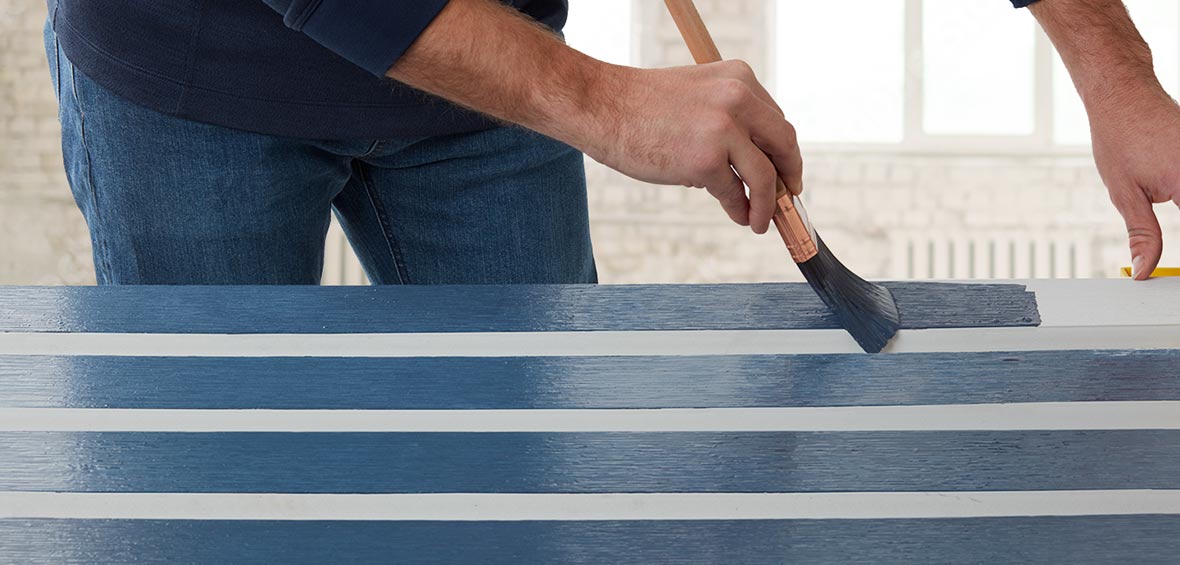
You can easily customize PVC with paint, and AZEK PVC is specially formulated with PaintPro® technology so paint adheres stronger, smoother, and dries faster than ordinary PVC. While you can paint PVC for aesthetics, it doesn’t need paint for protection like wood.
We recommend acrylic latex paint for the best adhesion and finish. You should only apply colors with a light reflective value of 55 or higher since dark colors can increase heat retention and risk expansion or damage.
Installing PVC trim isn’t any more difficult than working with wood, but you’ll appreciate the low-maintenance perks of PVC products. Ready to revamp your home exterior and deck? Find a contractor to help you customize a design you’ll love showing off for years to come.

Bring Enduring Beauty to Your Home
With AZEK PVC Trim and exteriors products.