If you’re planning to build a TimberTech® capped polymer or capped composite deck, you know every detail is important to consider so your completed deck looks just the way you intend. How to finish the ends of composite decking, also called end-cuts, is one such detail you’ll need to think about while planning your build.
Benefits to Finishing Composite Decking End-Cuts
✓ Gives you a refined, polished perimeter
✓ Keeps composite deck board ends from being fully exposed
There are a variety of ways to think through how to finish the ends of composite decking. Explore 3 top ways to finish your decking ends and discover inspiring images of completed builds to help inform your decision.
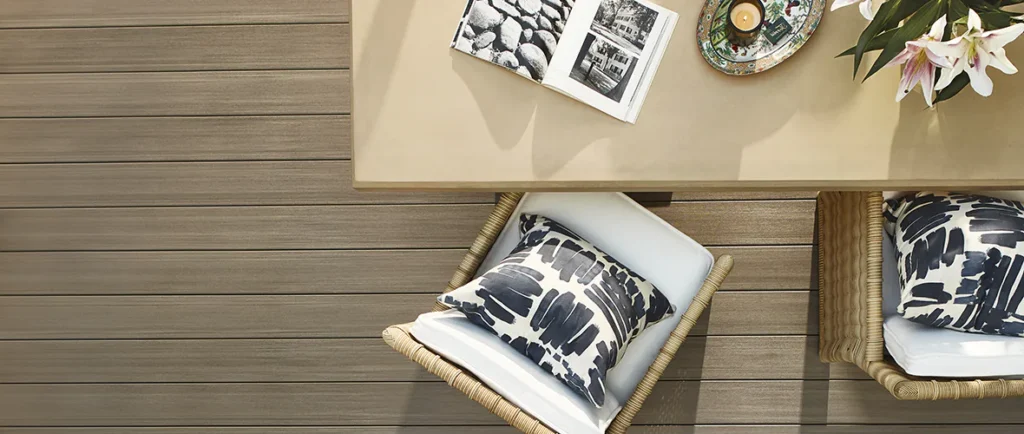
LEARN MORE ABOUT POLISHING OFF YOUR PROJECT
Get guidance on end-finishing options like picture framing, fascia application, and more in our Deck Building Resource Center. EXPLORE THE RESOURCE CENTER
1.) Picture Frame Border
A picture frame border is a common option for how to finish the ends of composite decking. And it gives you plenty of design opportunities to create a look all your own.
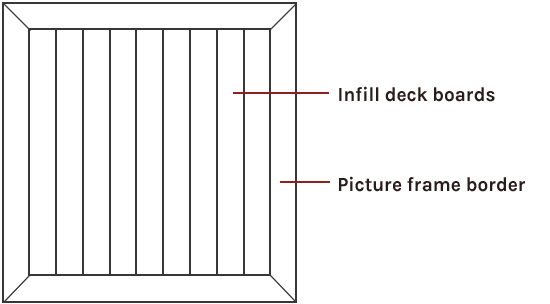
What Is a Picture Frame Border?
A picture frame border refers to at least one layer of boards — but up to three — laid around the perimeter of your deck, perpendicular to the infill deck boards.
Why Choose a Picture Frame Border
A picture frame border offers more benefits beyond simply covering your end-cuts, including:
✓ Aesthetic benefits, such as a polished perimeter
✓ A potentially DIY-able installation, with the right know-how and guidance
Aesthetic Benefits of a Picture Frame Border
✓ Gives your deck a polished, refined look, whether you choose a one-, two-, or three-board frame.
✓ Offers design versatility with the option to choose the same-colored board for a subtle look or a contrasting color for a bold aesthetic.
How to Install a Picture Frame Border
A picture frame border requires specific substructure framing, so you’ll need to decide on this option before completing your substructure.
If you have an existing substructure, you can add the additional substructure requirements, but make sure you first confirm the existing frame is structurally sound.
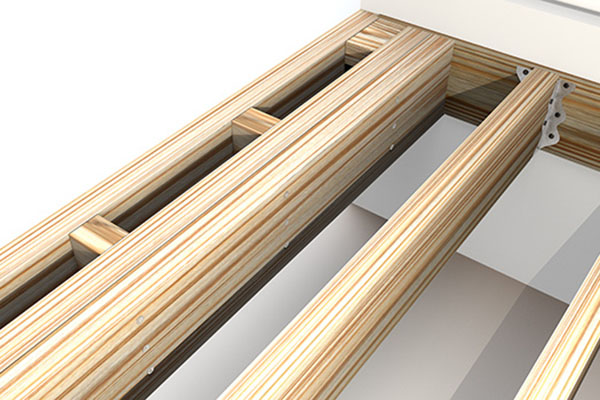
Framing Needs for a Picture Frame Border
To support the border boards, your substructure requires additional joists and blocking depending on whether you choose to do a one-, two-, or three-board frame.
NEED HELP WITH FRAMING?
Partner with a TimberTech-registered contractor who can ensure your substructure is installed correctly for the picture frame border you want. FIND A CONTRACTOR
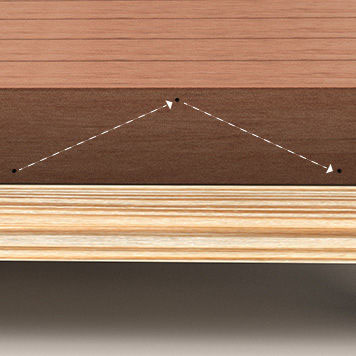
2.) Raised Fascia Board
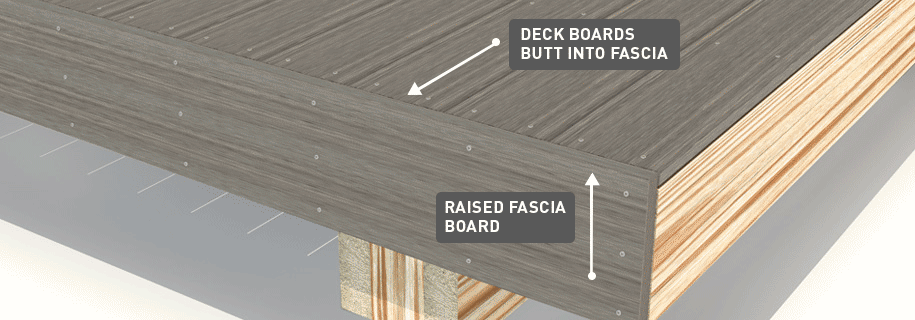
Fascia board, sometimes called “deck fascia” or “rim joist cover,” refers to the board used to cover the end-cuts and rim joists of your deck’s frame. In most instances, you can use an actual fascia board for the application or a deck board in place of fascia board.
Why Choose Raised Fascia Board
A fascia board raised to cover your deck’s end-cuts gives your deck a crisp, clean look.
Plus, fascia board is straightforward to install, with some guidance, even for first-time DIYers.
How to Install Fascia Board
Fascia board installation will vary slightly depending on which TimberTech decking line you’ve chosen.
TimberTech AZEK® Fascia Installation
Installing TimberTech AZEK fascia involves:
- Applying exterior-grade construction adhesive to the back of the fascia board.
- Positioning the board over the rim joist and end-cuts.
- Fastening the board with the appropriate fastener.
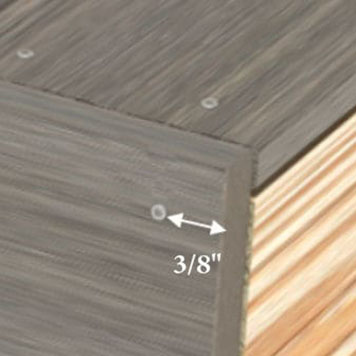
TimberTech PRO® and TimberTech EDGE® Fascia Installation
Installing TimberTech PRO or TimberTech EDGE fascia involves:
- Positioning your board over the rim joist and end-cuts.
- Pre-drilling 2” from the top and bottom of the board, alternating between the two every 12”.
- Fastening the board with the appropriate fastener.
3.) End Coating
End coating refers to a type of paint you apply to your end-cuts. As an option for how to finish the ends of composite decking, end coating is ideal for just a few exposed ends. This is the case because end coating does not offer the same level of protection — nor as sophisticated an aesthetic — as fascia or a picture frame border.
Why Choose End Coating
An Easy Application
End coating is the easiest option for how to finish the ends of composite decking and requires no tools but a paint brush.
How to Apply End Coat Paint
Choose the recommended paint color to match your deck board and apply the paint just to the ends of the boards where the core is exposed. Let dry and you’re done.
Ideas for How to Finish the Ends of Composite Decking
Not sure which option is the right one for you? The good news is you don’t have to choose just one — unless you want to. You can combine options for a look all your own.
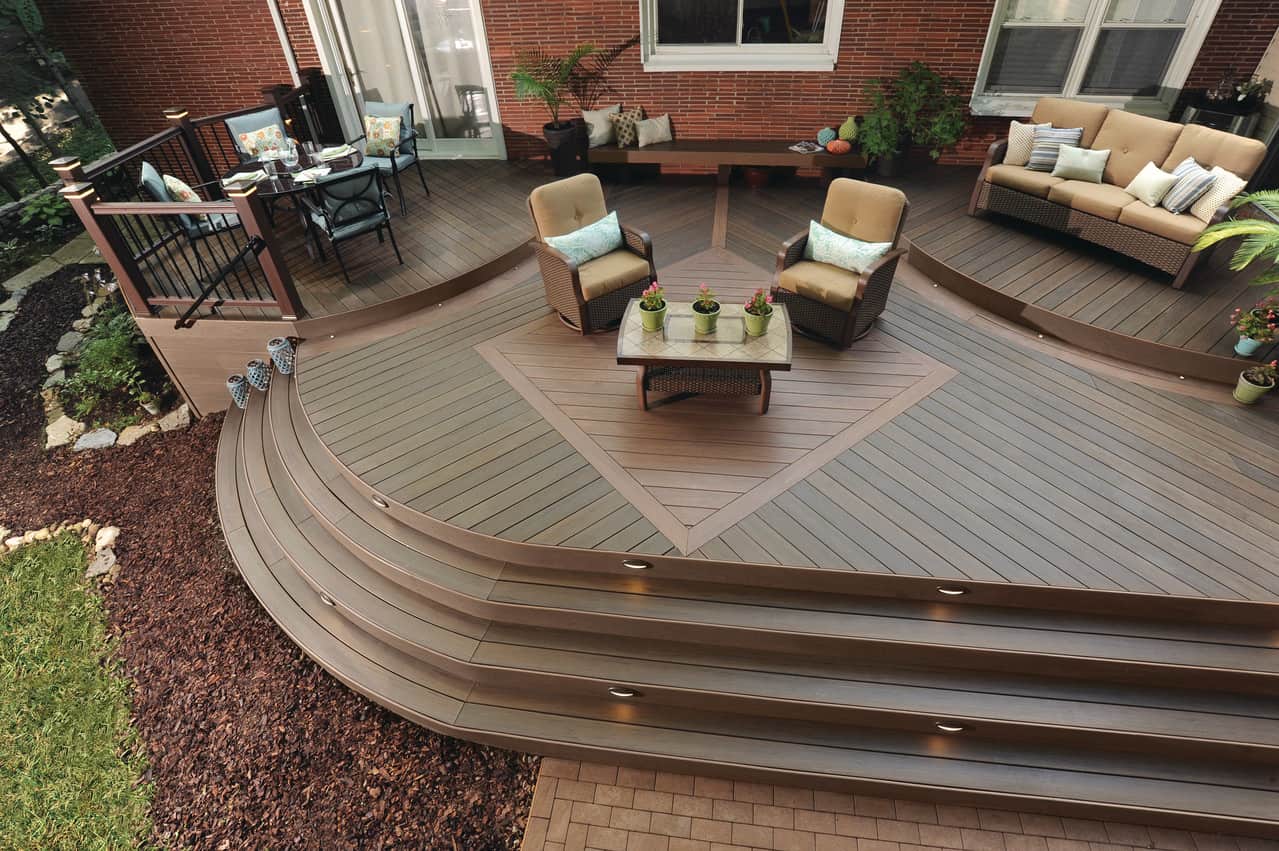
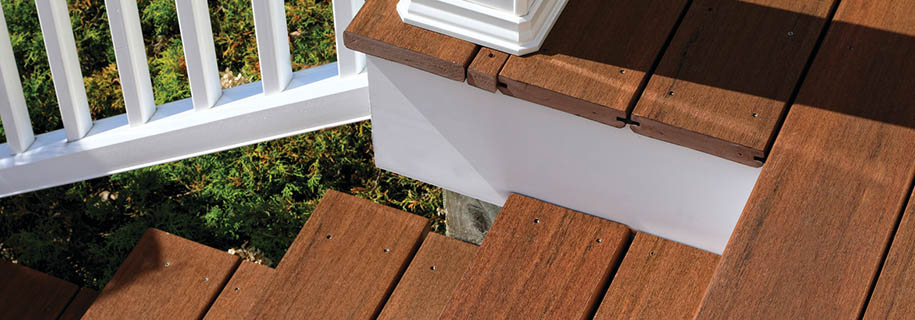
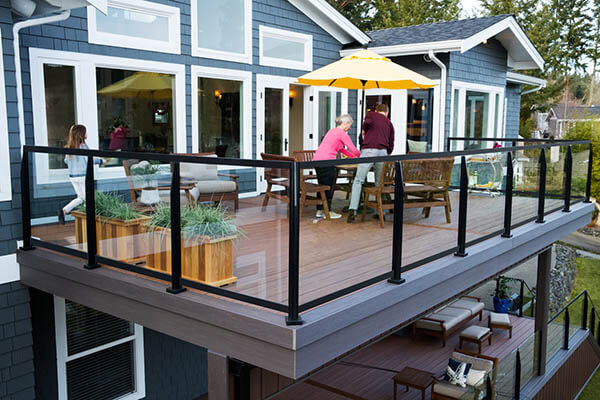
Picture Frame Border
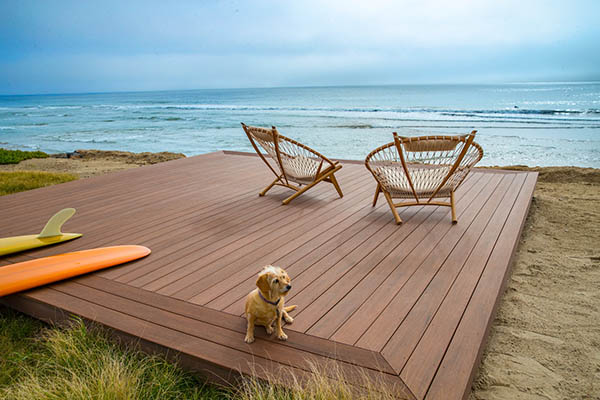
An elegant three-board picture frame border gives your deck a defined edge with bold sophistication.
Plus, the covered end-cuts of this low platform deck are well-protected on all sides.
Prefer fewer border boards? Learn how to apply one or two boards for your picture frame.
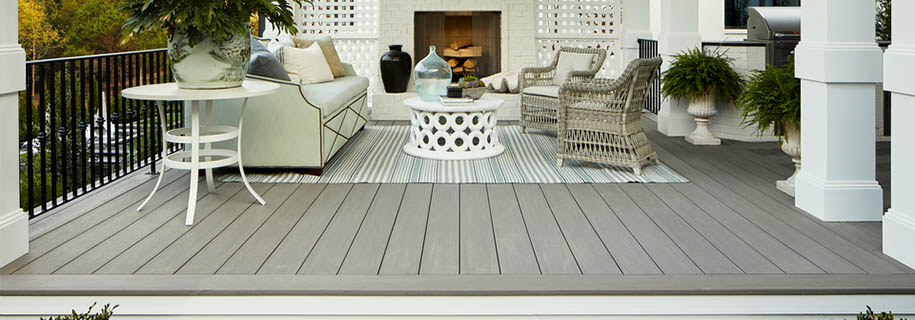
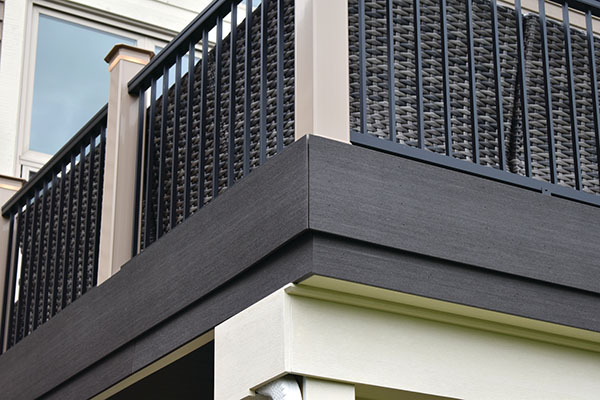
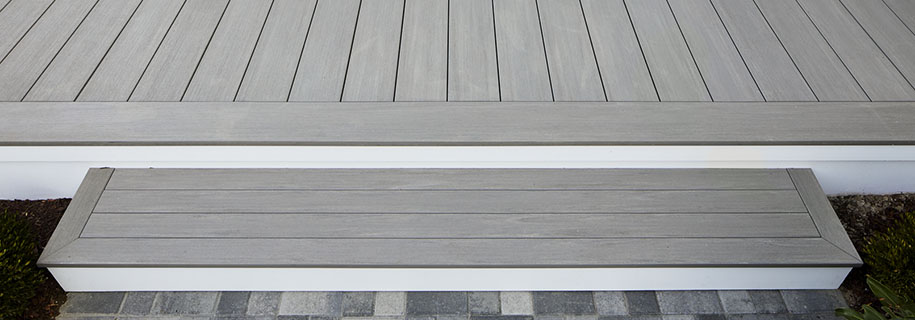
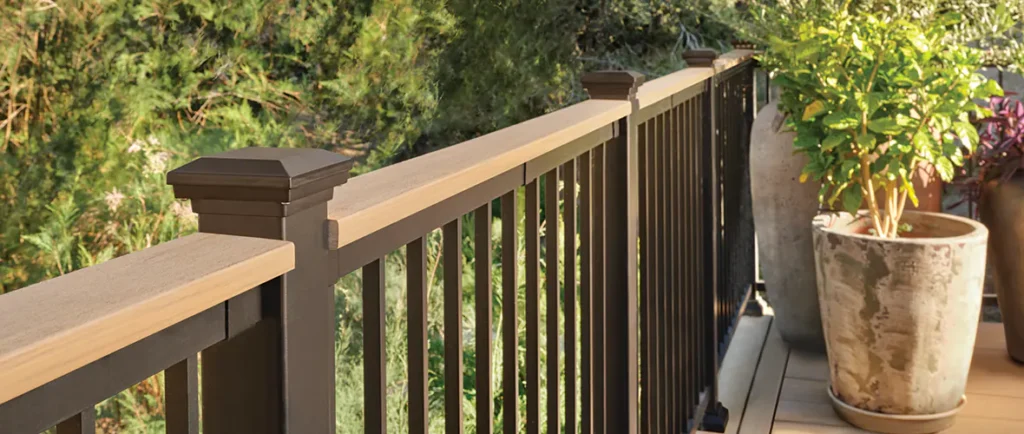
Raised Fascia or Deck Board
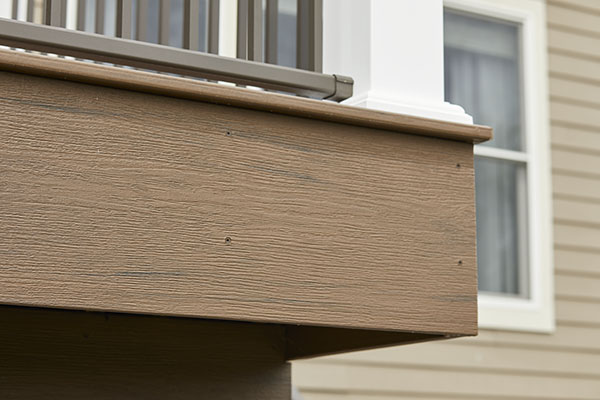
Opt for a clean, minimalist perimeter with a fascia board or deck board to cover your end-cuts. This perimeter features a wide-width deck board layered on top of a fascia board. The top of the deck board sits flush with the deck surface. Multi-Width Decking standard- or wide-width boards can both be used in place of a fascia board for varied looks. Narrow-width deck boards will not work as well in a fascia application.
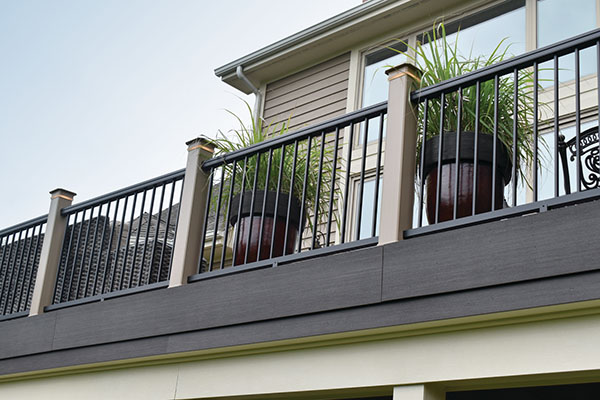
Picture Frame Border With Fascia Underneath
For a bit more dimensionality in your deck perimeter, cantilever a picture frame border over a fascia board of the same color. Choose this popular combination to add just a touch of depth and dimension to your perimeter.
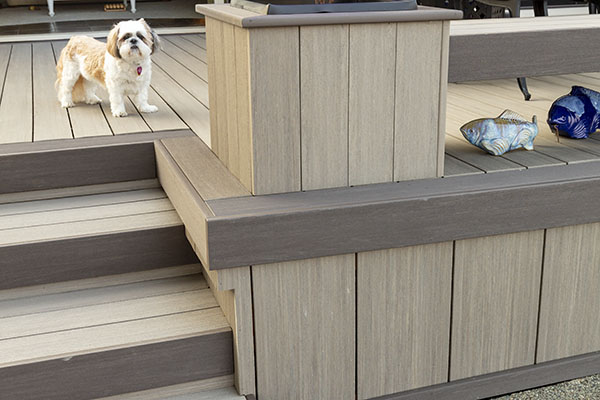
Deck Board as Fascia & Picture Frame Border
Go for a picture frame border of a complementary color to your deck surface for an attractive, defined perimeter. Adding a deck board that sits flush with the picture frame gives your deck even more visual interest as it sits above the lighter colored fascia boards used as deck skirting.
Fascia Board & Picture Frame Combination
Choose a bold border for your deck by mixing warm and cool tones for your picture frame border and deck surface. Go for a multi-dimensional look by installing a deck board over a fascia board. The fascia board sits beneath the cantilevered picture frame border while the deck board is applied on top of the fascia board to sit flush with the picture frame border. The layered perimeter gives your deck a dynamic look.
Now that you’re familiar with different methods on how to finish the ends of composite decking, you’re ready to decide which option is right for your build — and then get the job done.
Explore more resources for covering your end-cuts and then go even further. Discover helpful videos, step-by-step guides, and installation tips for every part of your deck build in our comprehensive Deck Building Resource Center.
Get the DIY Insight to Do Your Project Right
Dive into our Deck Building Resource Center for easy-to-follow tips, guided install videos, and more.
