
Properties naturally roll with bumps and hills, sloping towards creeks or rising gently to a terrace. You can level slightly uneven yards, but how do you build a deck on a slope?
It’s easier than you think and follows a similar process as any other deck installation. Building a deck on a slope requires some extra planning upfront, but a hillside home won’t stop you from enjoying a gorgeous new deck.
Explore general advice to plan your project and the steps to begin building below.
In This Article:
- Step 1: Deck location
- Step 2: Deck design
- Step 3: Decking materials
- Step 4: Hire a contractor
- DIY deck on a slope
Step 1. Determine deck location
Factors like existing structures and landscaping, privacy needs, and the deck’s function help you determine the perfect spot for your new deck.
Most decks connect to the house, typically at a back door. Of course, you can build disconnected platform decks or pool decks instead. Consider how you want to use your deck to narrow down your options.
You’ll also want to consider the yard slope and landscaping. You may be able to avoid steep slopes or removing trees by adjusting your placement.
Finally, think about how you want to enjoy your deck. You may want plenty of sunshine around a pool deck or nice, big shade trees in a hotter climate. Also consider what views you’ll see from your deck and how your deck placement may obstruct existing views from other areas of the yard.
Step 2. Plan deck size and design
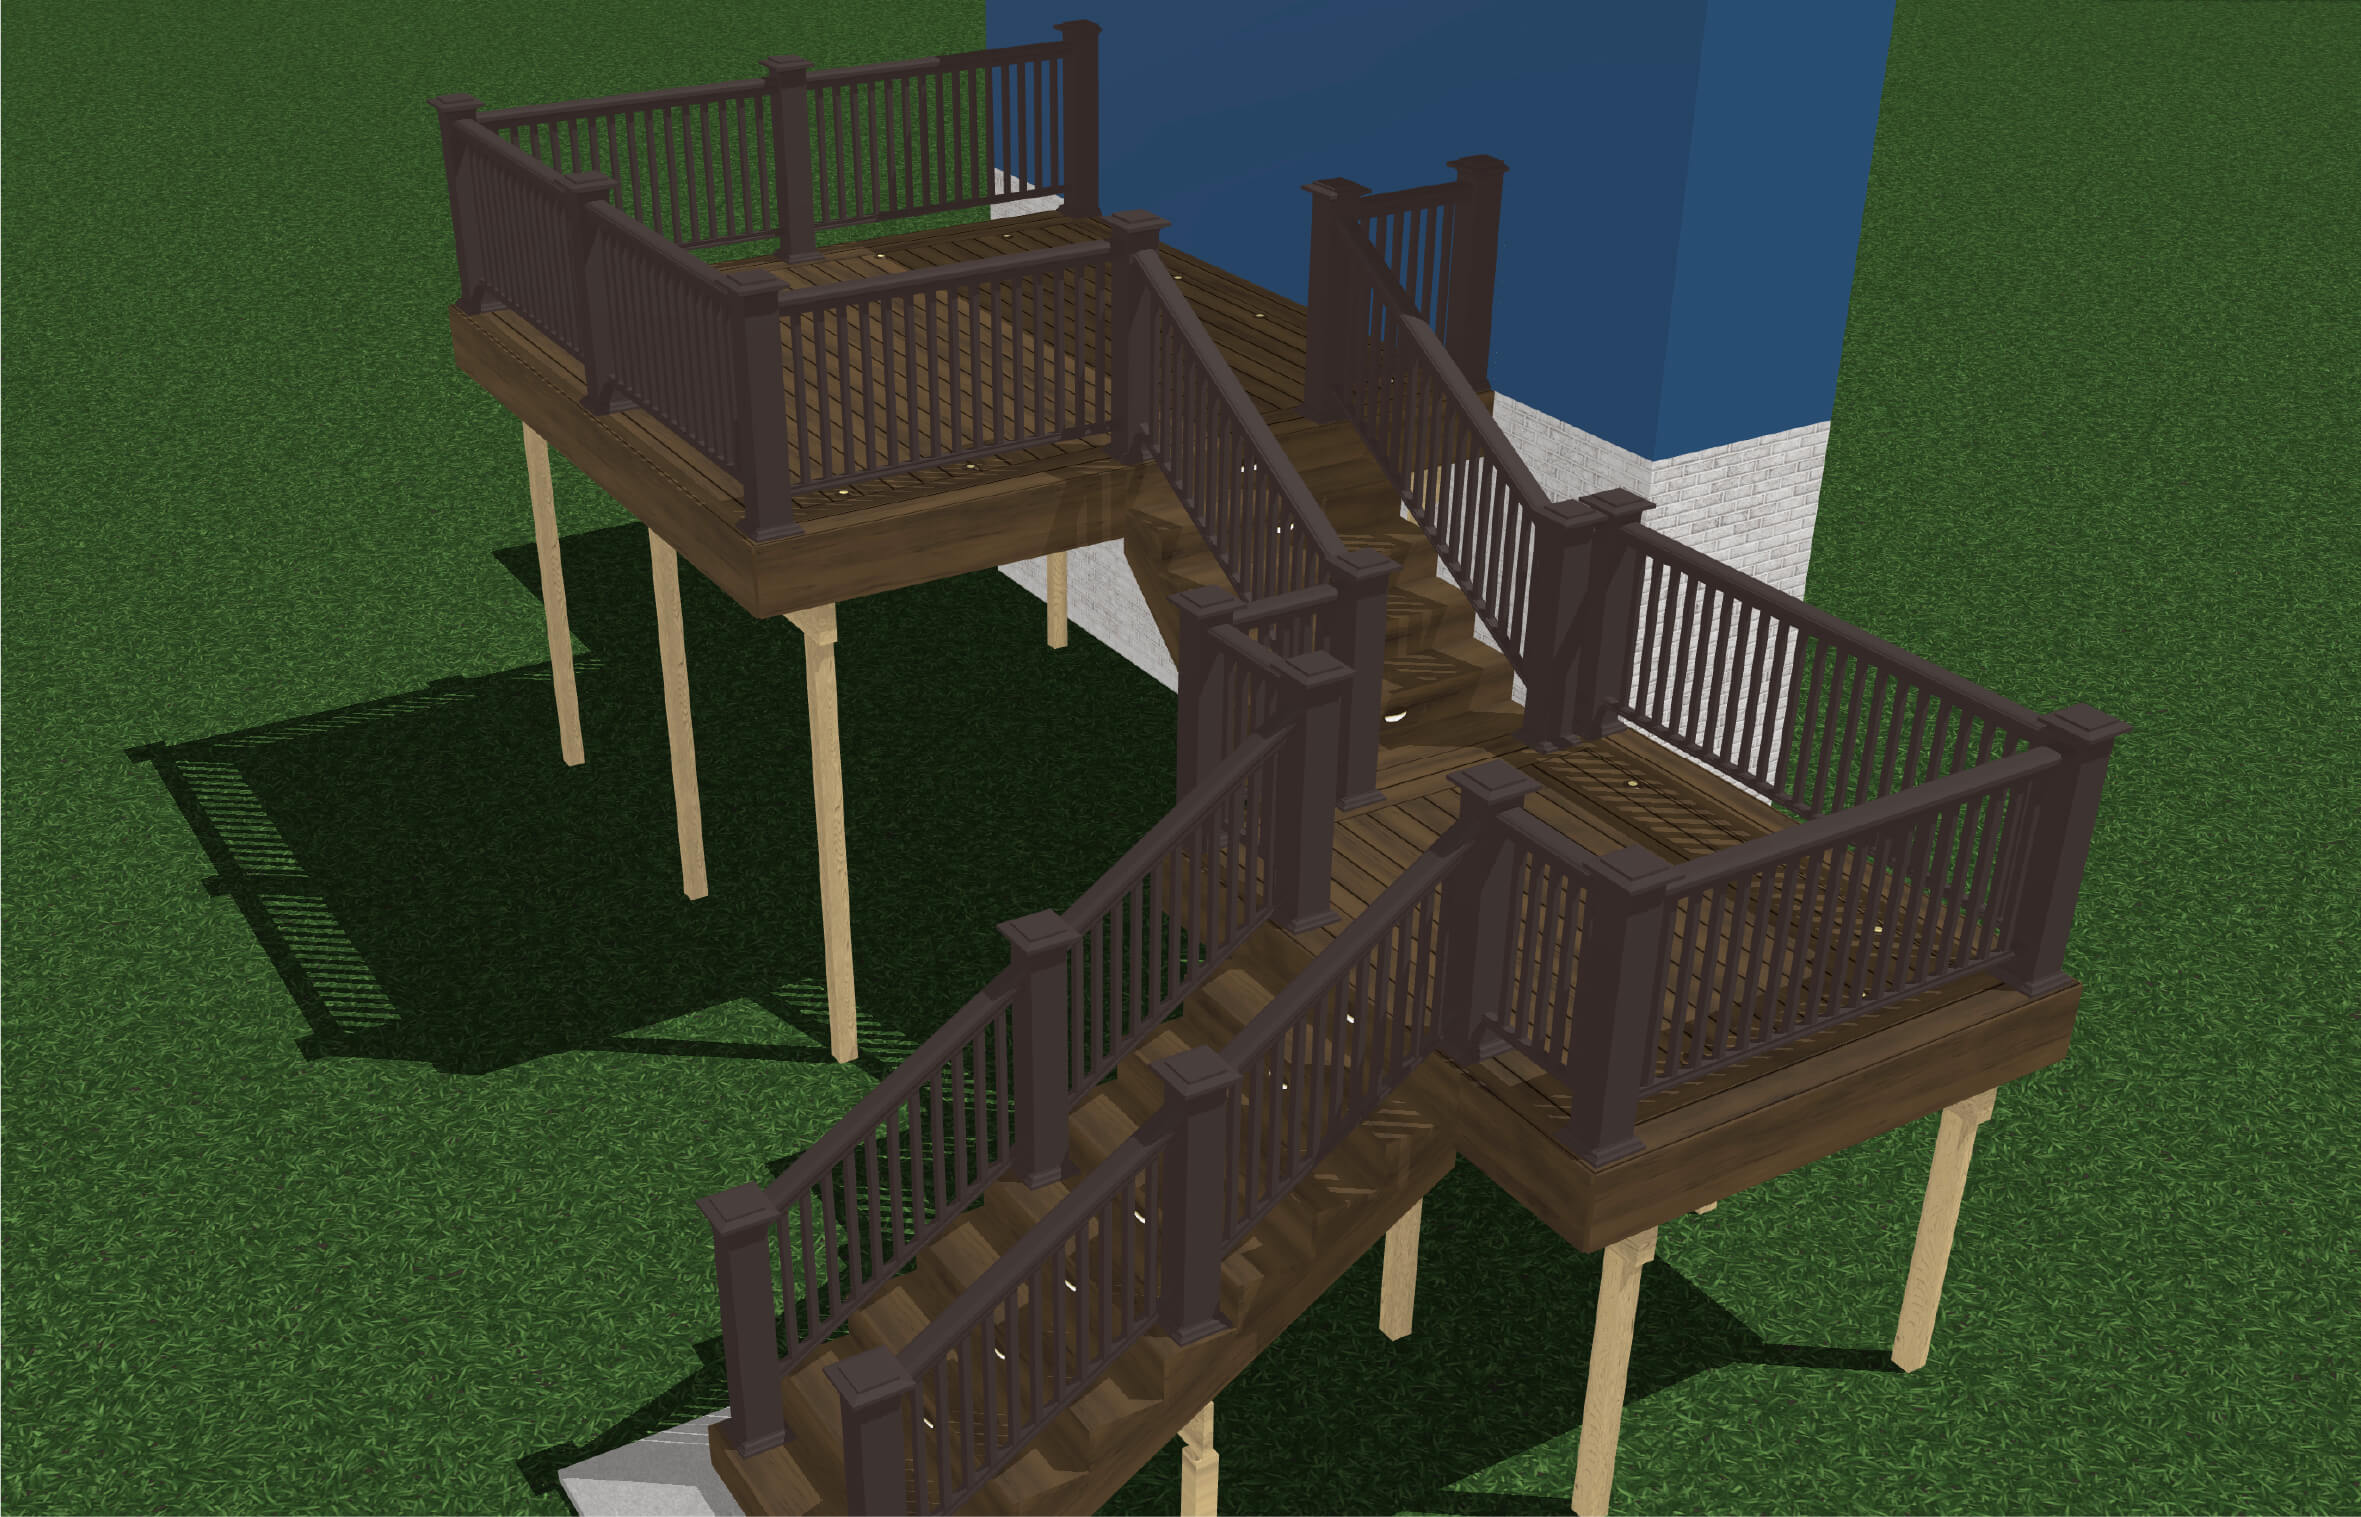
You’ll want to customize your deck design and size according to your property goals and features. You can certainly build a simple elevated deck on a hillside, but multi-level decks may be the best choice for steep slopes. This supports a cohesive design between your deck and property and allows you to segment your deck by use.
If you’re unsure which deck design is best for you, explore inspiration online and consider your goals. You may also contact a professional contractor to discuss your options — especially if your slope is steeper than 45 degrees.
Step 3. Choose decking materials
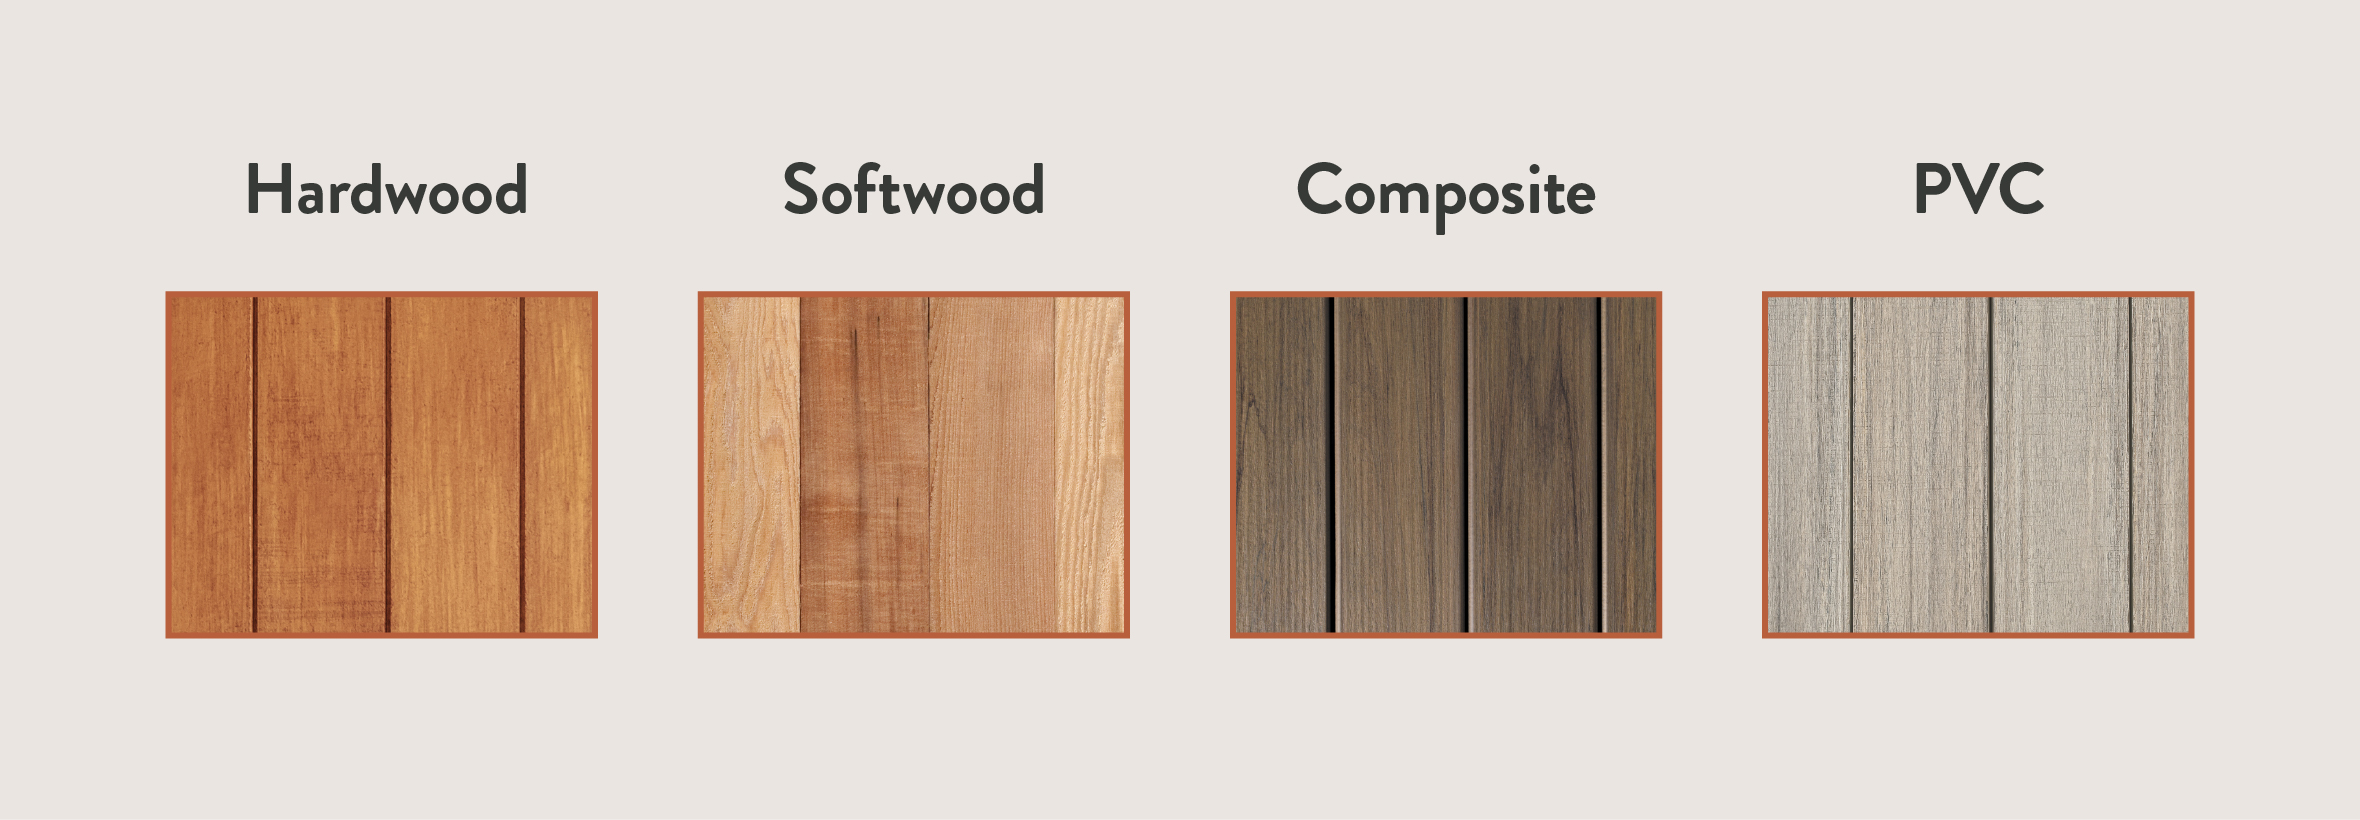
Next in any decking project is determining the best materials for your project. You have four deck material options, including:
- PVC decking: low-maintenance, durable decking made entirely of synthetic polymers.
- Composite decking: low-maintenance decking made using wood fiber and recycled polymers.
- Hardwood decking: high-maintenance, durable decking made of hardwoods.
- Softwood decking: high-maintenance, low-cost decking made of softwoods.
Each material has its perks and is suitable for a deck on a slope. However, TimberTech Advanced PVC and Composite Decking are lightweight, which can make installation easier — especially when you’re hauling materials up a slope or stairs.
Step 4. Hire a contractor
The final pre-planning phase depends on whether you plan to DIY your deck or hire a contractor. Contractors are product and building experts that can help construct a structurally-sound deck. This is particularly important if you’re working with a custom design or extremely elevated deck where installation can be tricky.
A contractor also has the experience to identify and troubleshoot problems before they arise. This means your deck is installed quickly without excessive time or material waste.
Qualified contractors are worth the cost, but experienced builders can DIY their new deck and save on labor costs.

Bring the Beauty of TimberTech to Your Backyard
Work with a TimberTech pro for a build that transforms your outdoor living space.
DIY deck on a sloped yard
Building your own deck is a more advanced home improvement project. Particularly if you’re building a deck on a slope, where you may need to customize your design or troubleshoot leveling problems.
If you’re up for the challenge, check out these steps to build your own deck.
Install deck footings
Deck footings are the first step to building your foundation. The footings hold posts that hold the rest of your structure.
There are a few different ways to install deck footings. You may be able to use manufactured concrete deck blocks in warm weather climates. You’ll need to install footings according to your frost line depth if your home experiences winter freezes. In either case, always follow local building code requirements.
Here’s an overview of how to install concrete footings:
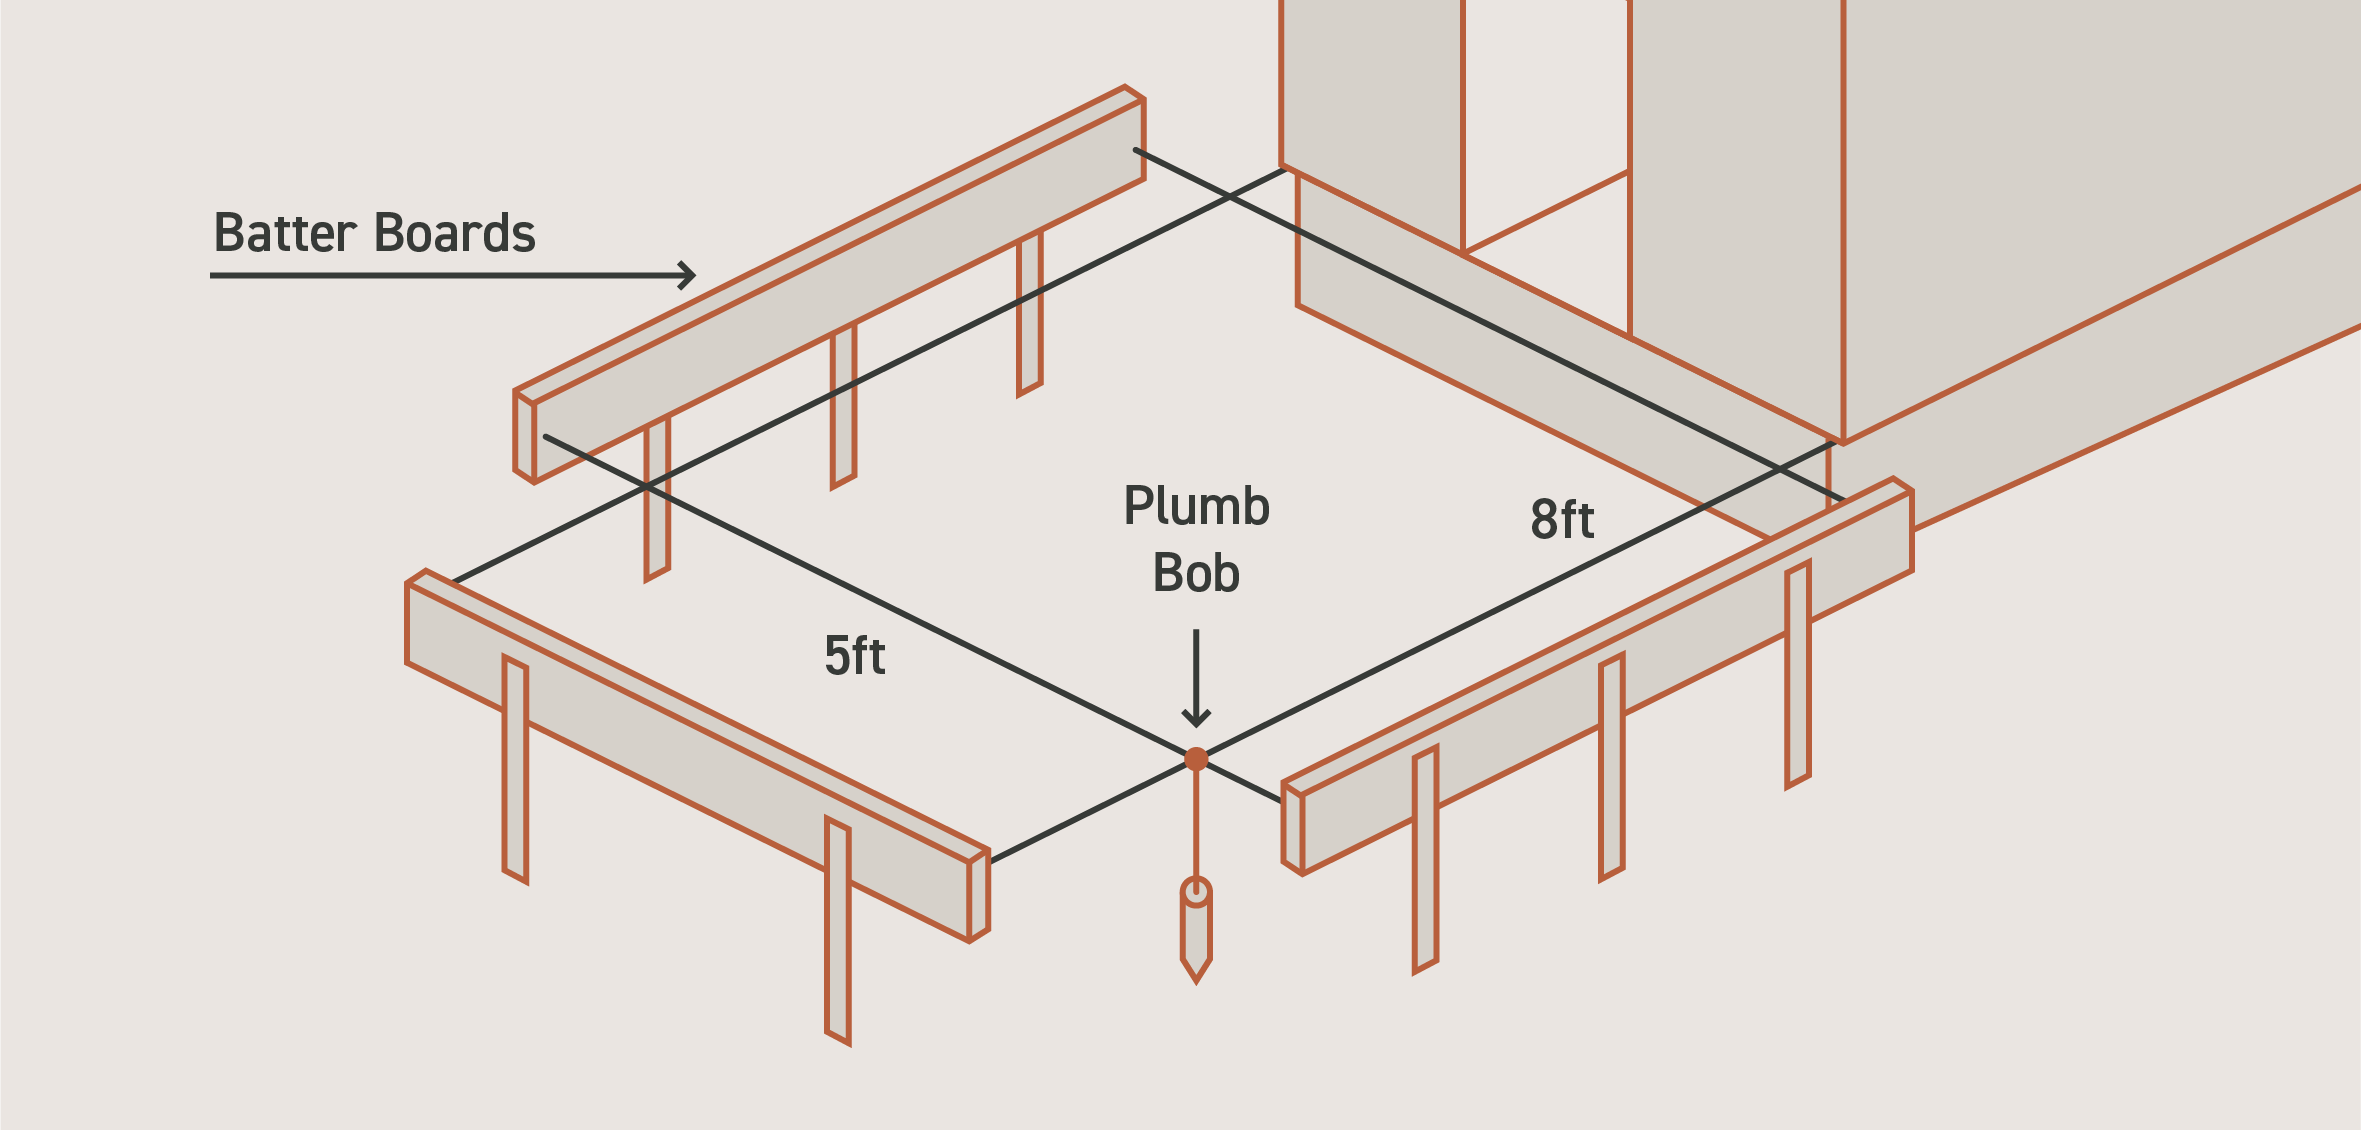
- Mark your posts’ placement with batter boards and string lines. Create batter boards out of spare lumber and stakes. Measure your deck dimensions and install string lines to mark the deck edge, plus a foot of space to accommodate the installation. Then measure where your posts go from the deck edge and use a plumb bob to mark the post’s center.
- Dig post holes using a post hole shovel or gas-powered post hole auger. Ensure they’re below your frost depth line and align with your post measurements from step one.
- Compact loose gravel and dirt at the bottom of the hole. You can use spare lumber or tampers.
- Measure the depth and cut a cardboard form to fit just a couple of inches above the hole. Cylindrical forms make leveling footings easier, but you can opt out and pour concrete directly into the hole.
- Install the form and backfill dirt to secure it. Tamp dirt lightly and watch the form to ensure it still lines up with the post center.
- Pour your concrete into the form until full. Smooth the top of the concrete and allow it to firm.
- Place post anchors flush in slightly-firm concrete. Pull tight string lines to make sure anchors are in line with each other.
- Allow to dry fully.
Now your footings are ready for the rest of the substructure.
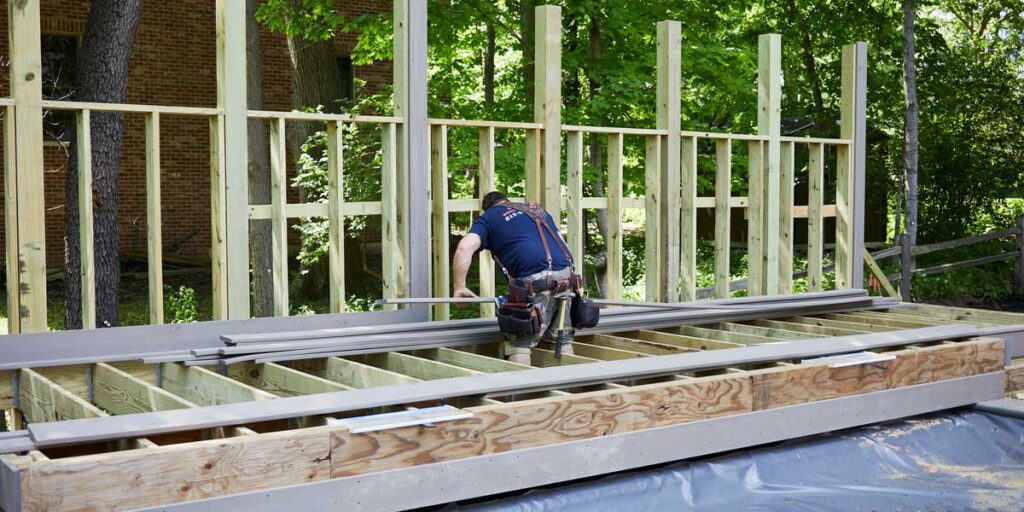
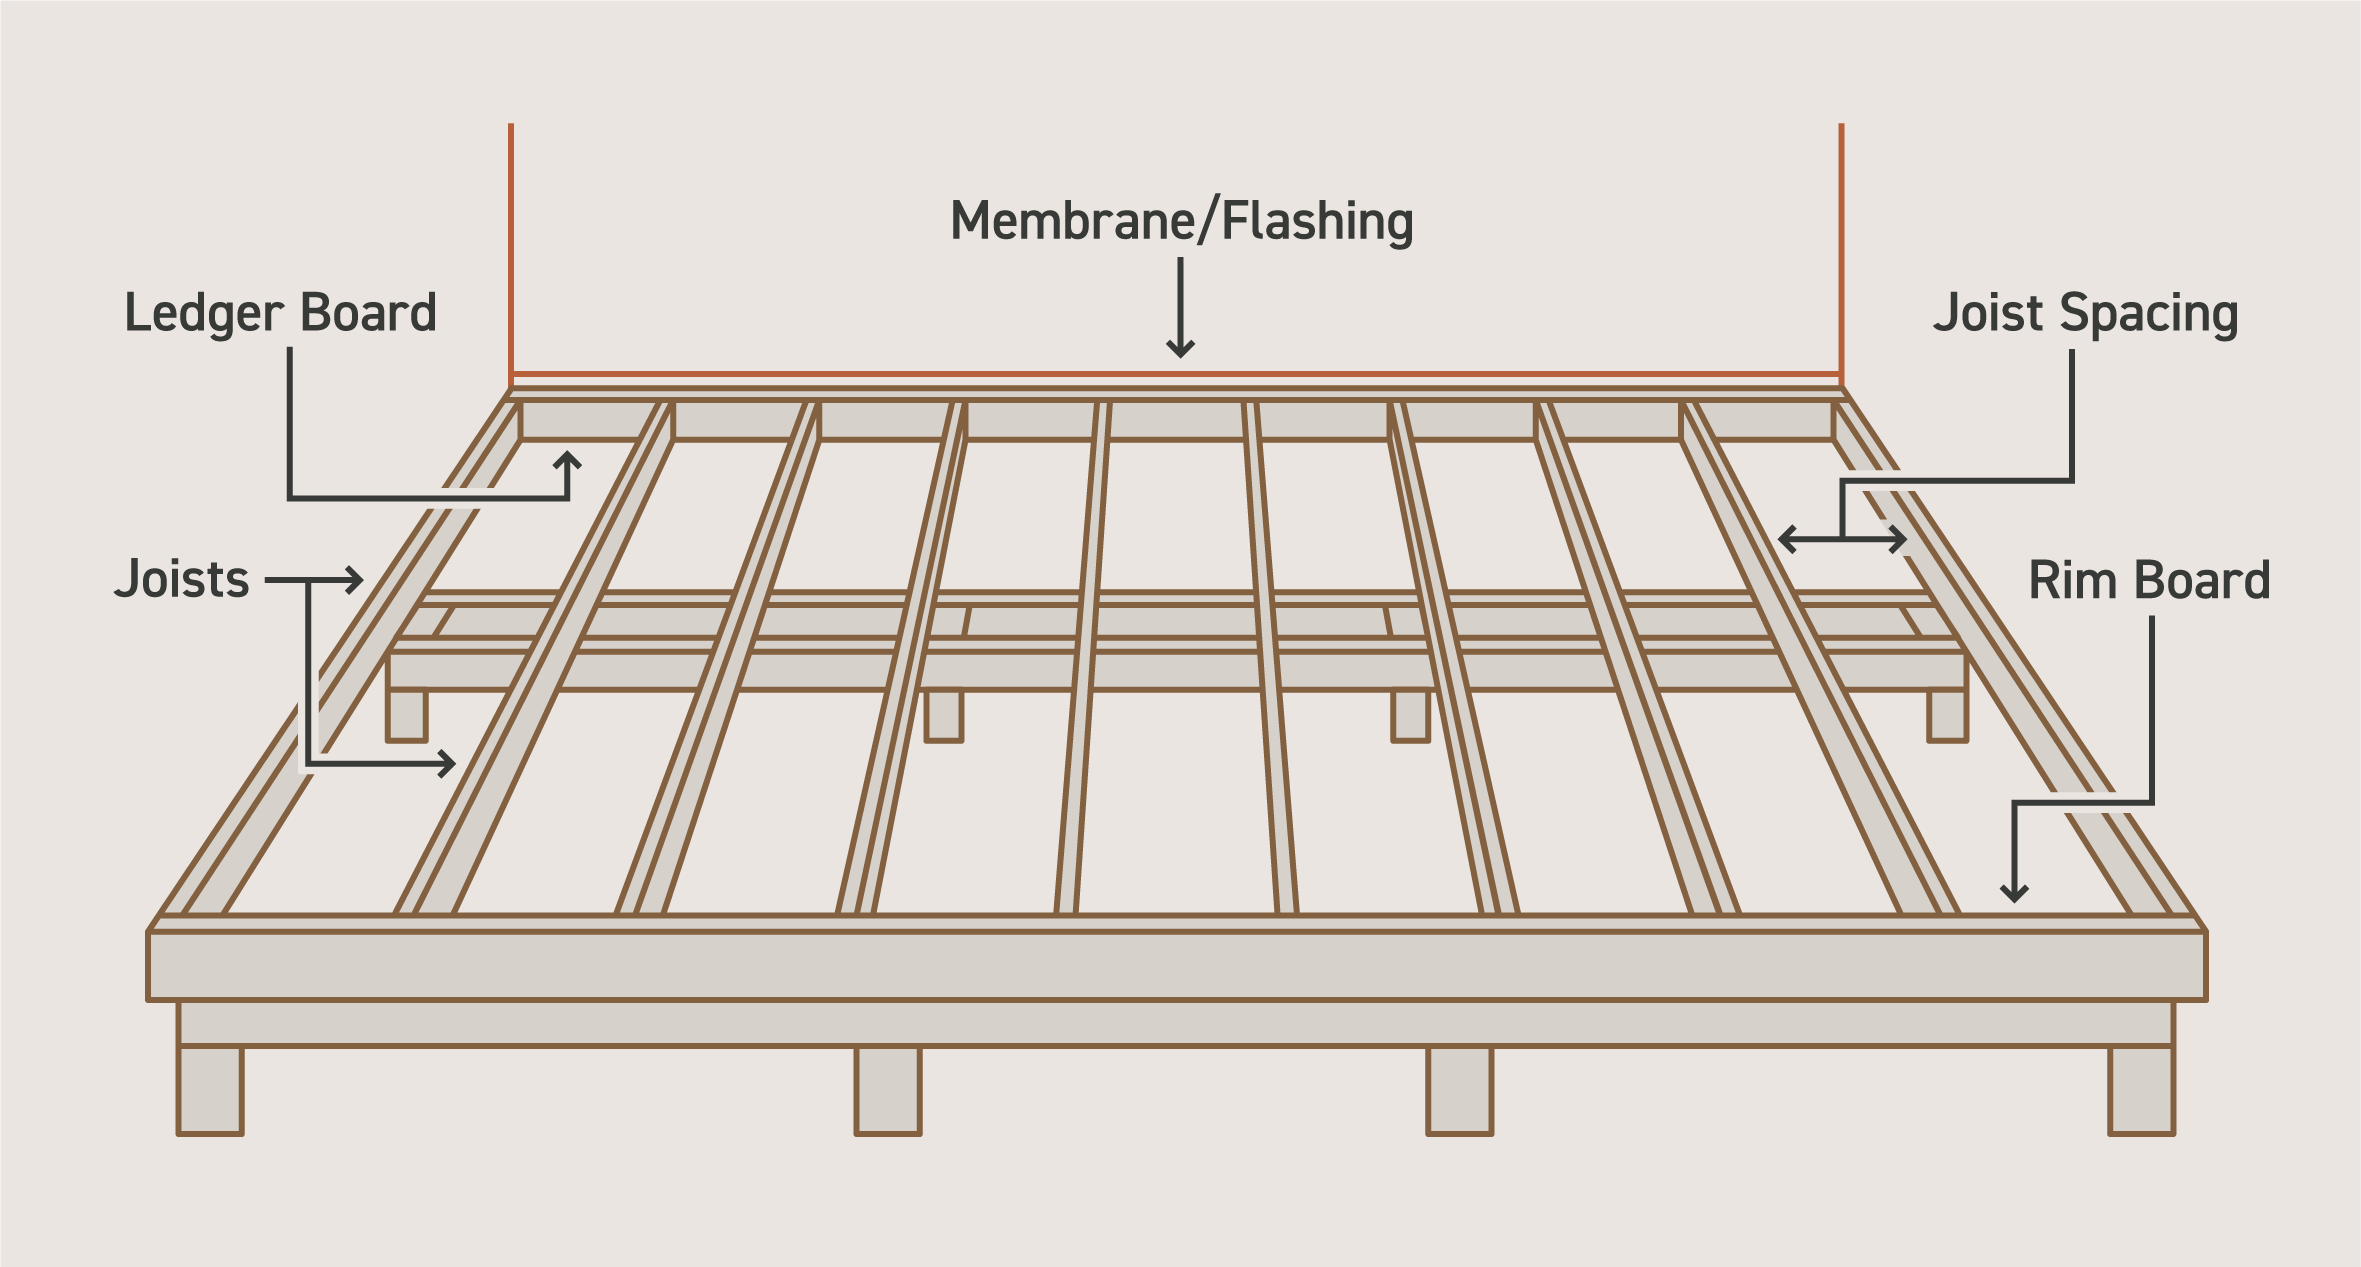
Build your substructure
Your deck’s substructure includes the support posts, beams, joists, and ledger board. The wood substructure supports the deck’s load, and you’ll install the decking boards on top. Proper joist spacing is key, so always follow your deck design to a T and double-check your measurements as you go.
TimberTech Tip:
Follow your manufacturer’s substructure spacing instructions if you’re working with PVC or composite decking.
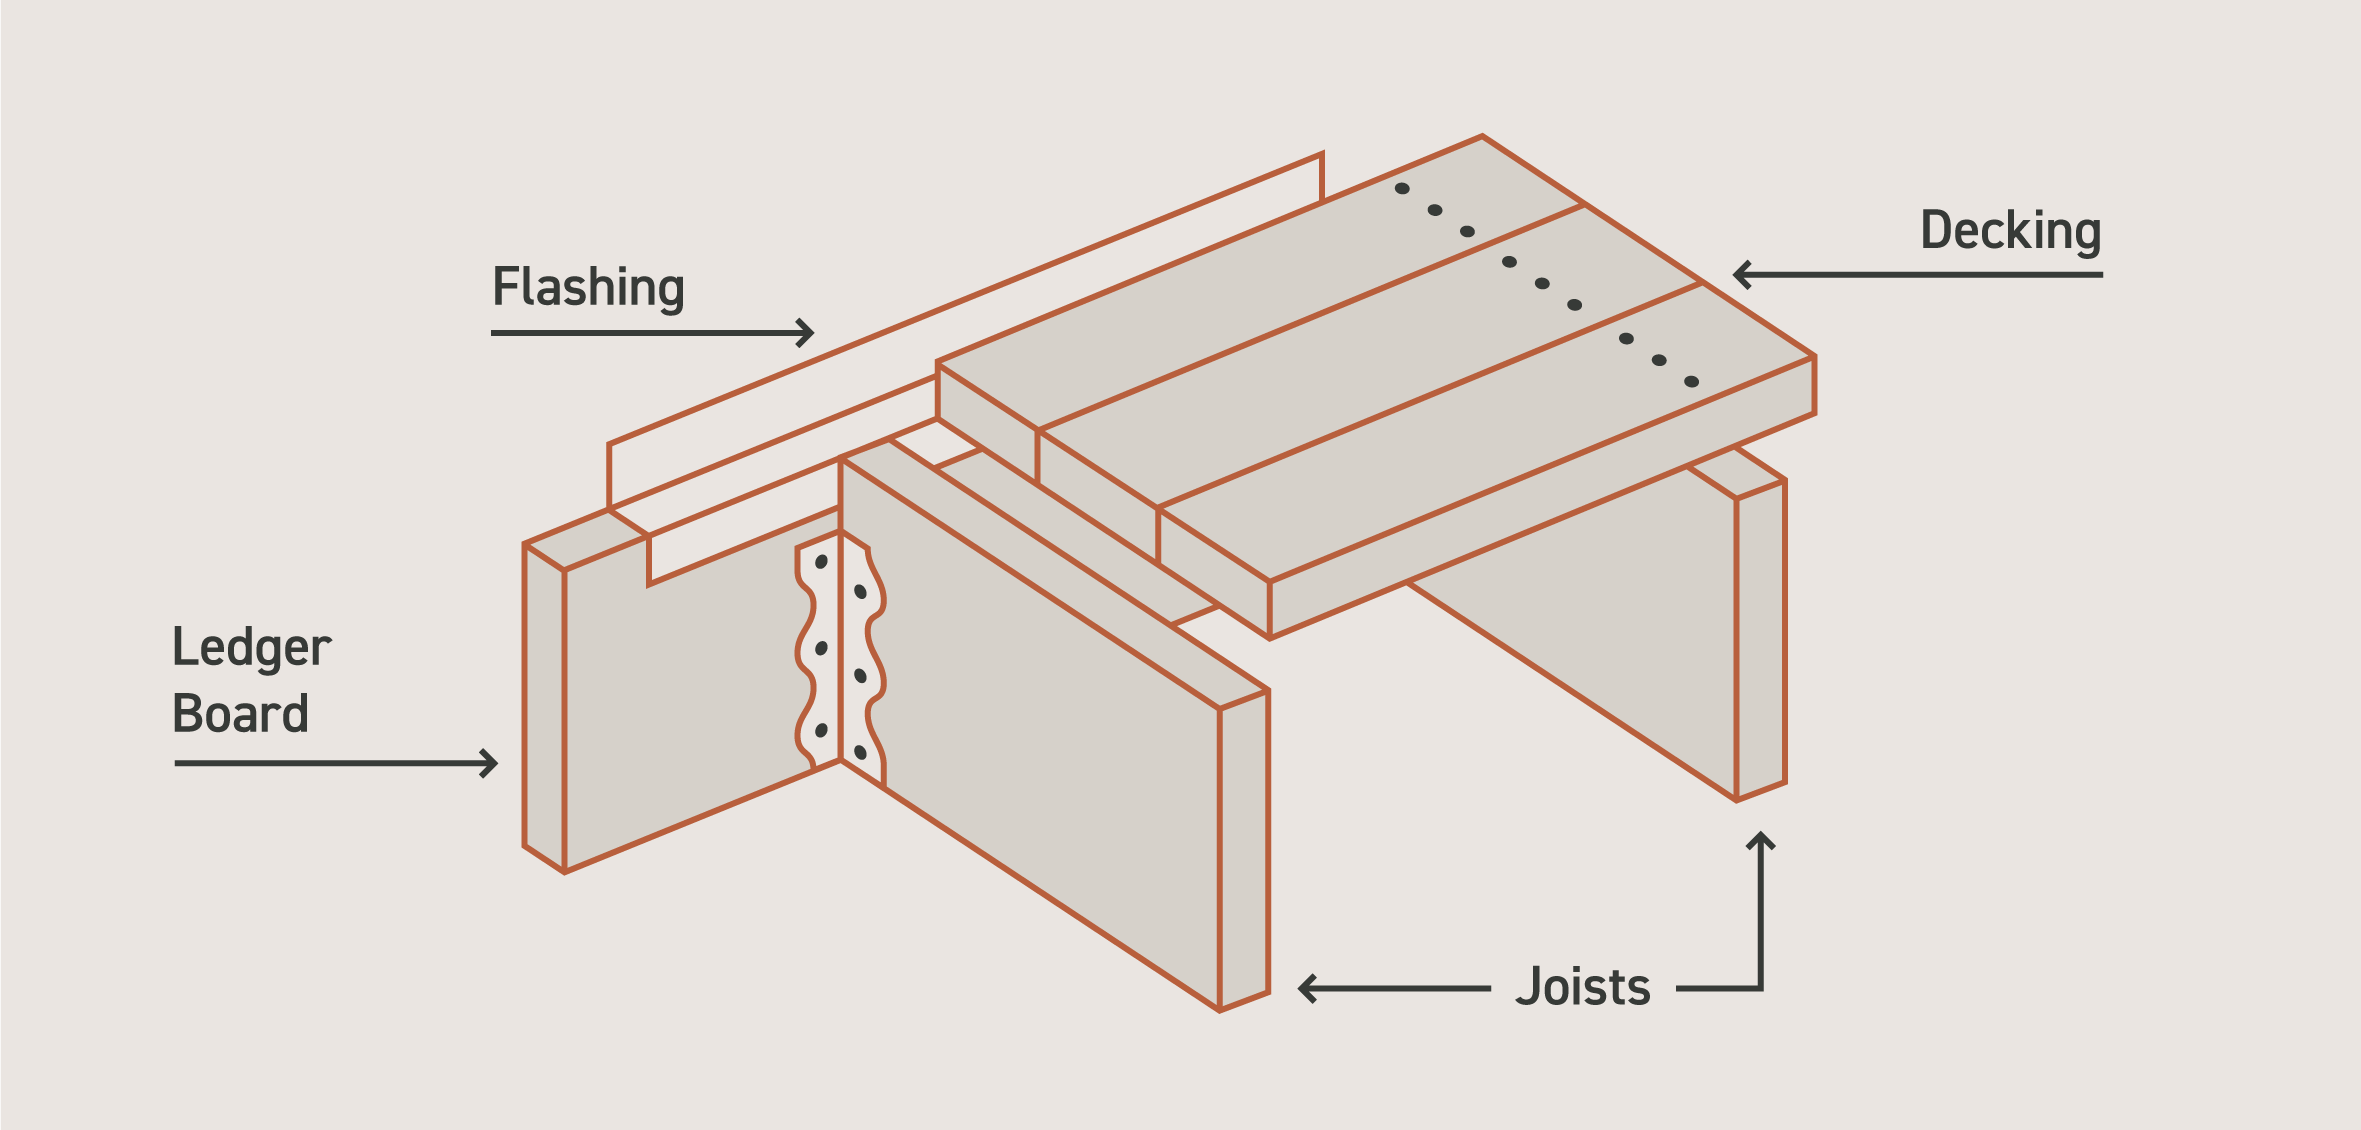
Ledger board
The ledger board connects a house to a deck, and it’s a critical component for stability. Below are the general steps to install a ledger board, but it can vary with your home and deck design. Consult a professional if you’re not confident with this step.
- Determine the ledger board location on the home’s exterior wall, slightly lower than the home’s threshold. Mark where the board will go and remove any siding where the ledger board will install.
- Secure your ledger board to the home. Use approved lag bolts for wood or approved masonry anchors for concrete foundations and pre-drill pilot holes before fastening.
- Install a flashing sheet over the ledger board. It will fit as an “L” shape, with the flashing placed against the home’s foundation, behind any siding, and on top of the ledger board.
Posts
Posts install in footing anchors and support the deck beams and joists. Post heights will vary when you’re installing a deck on a slope — even if the deck itself is a single-level design — so measure your post height using the existing ledger board and footings for reference.
- Measure your post height by placing your first post in the anchor without installing it. Next, hold a joist where it will fit in the ledger board and level it with your post. Mark the bottom of the joist. Then measure your beam width and mark where it would fit under the joist marking on the post.
- Cut your post to the appropriate height — where the beam was marked — before installing.
- Continue to measure and cut each post. Height will vary according to the slope of your property.
- Place the posts in their anchors. Temporarily secure them with a nail or screw until the final secure attachment is made.
- Ensure each post is plumb and level, then fasten them securely.
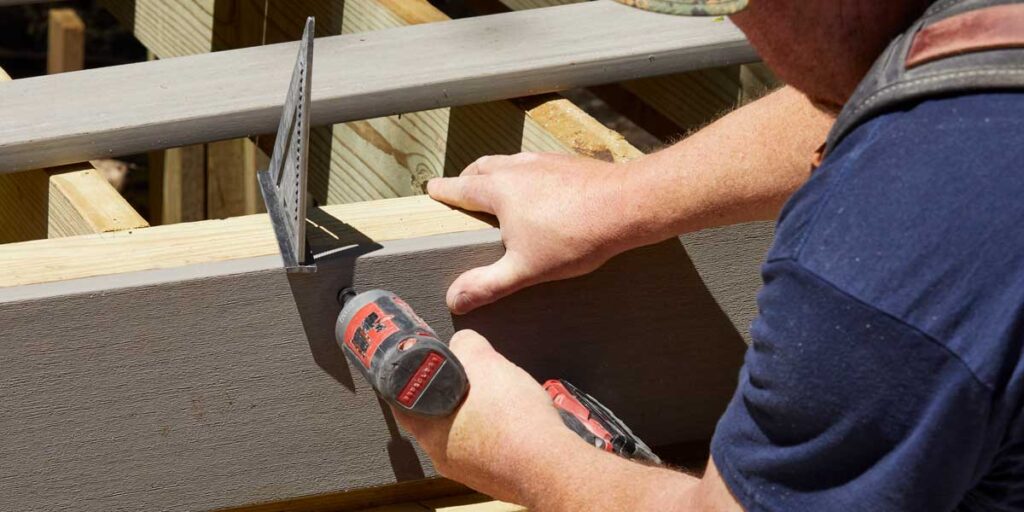
Beams and joists
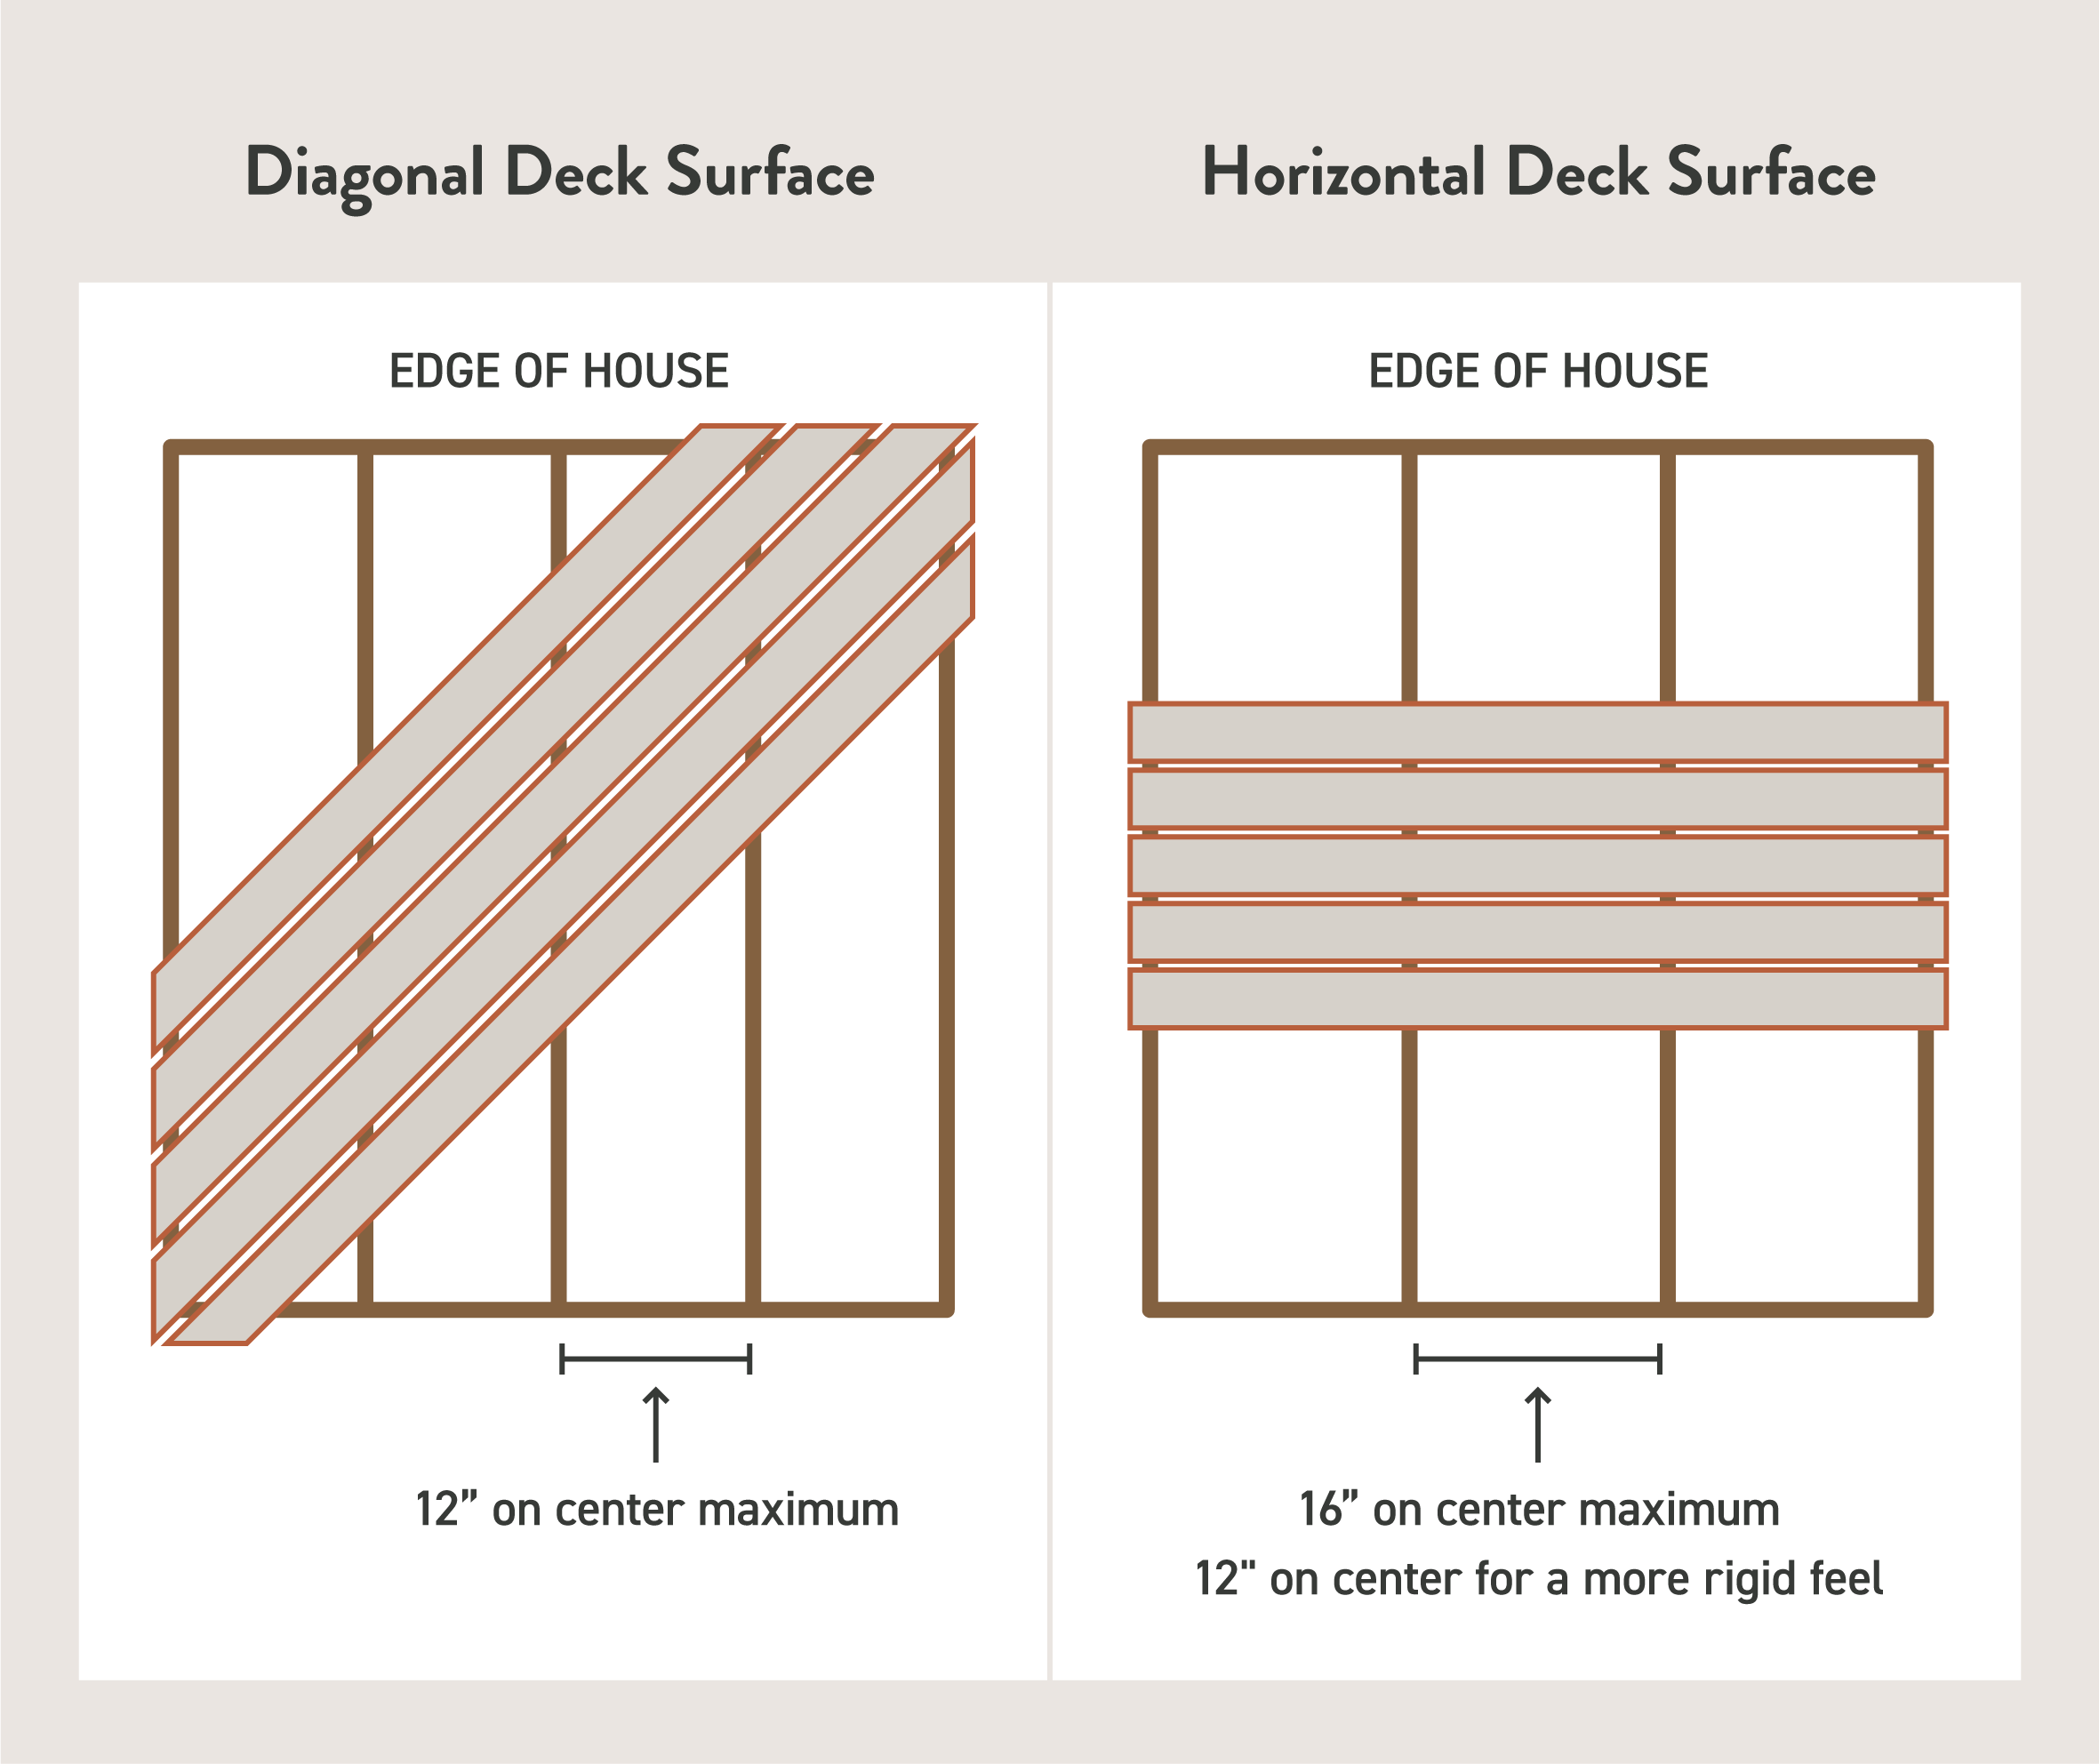
Install beams that will support the joists. Space your joists according to your decking needs — 16″ on center is acceptable for TimberTech decking, but consider 12″ on center for a more rigid feel.
Use tight string lines throughout installation in multiple locations to ensure the top of joists are in plane.
- Attach beams to your deck posts. You can use 4″x beams or create your own beams using multiple structural framing members.
- Install an end joist on top of the beam and fit into the joist hanger on the ledger board.
- Measure and mark the remaining joists based on your deck design or manufacturer guidelines.
- Install the remaining joists.
Install deck surface
How you install your decking depends on your material choice, but the process is similar. We’ll cover the process of installing TimberTech composite decking with a few reminders for other popular materials. Don’t forget to look at your local deck building codes for compliance before you start.
- Store decking properly in a flat and cool place to avoid direct sun exposure, which will increase the board’s temperature and length. Keep your decking cool throughout the installation.
- Cut decking only when you’re ready to install — waiting too long after cutting gives the board time to contract or expand, which will affect your deck board length.
- Place deck boards with a 1/8″ to 1/4″ side-to-side gap between boards.
- Don’t leave a gap between butt joints, splicers, or miters when installing TimberTech Advanced PVC.
- Fasten decking into framing with screws according to your product and manufacturer guidelines.
- Alternatively, use top-down fasteners like Cortex or TOPLoc for best results and to minimize movement and gapping.
- Drive screws a minimum 1.25″ depth into the solid wood substructure, and ensure screws are flush or slightly countersunk into the decking.
- Regularly check that deck boards are installed straight with consistent gapping and spacing using a string line or spacing tool.
Once you finish installing composite decking, clean the dust and debris and enjoy your new deck!
If you opted for wood decking, you’ll have to sand, stain, and seal the deck boards once you install them. Re-seal your deck every one to three years as necessary to prevent rot and water damage.
Finish with railings and accessories
Finally, you’re ready to finish your deck with railing and other accessories. Your local building code will have specific guardrail regulations, so always consult your building office before ordering materials. Here are some common railing regulations:
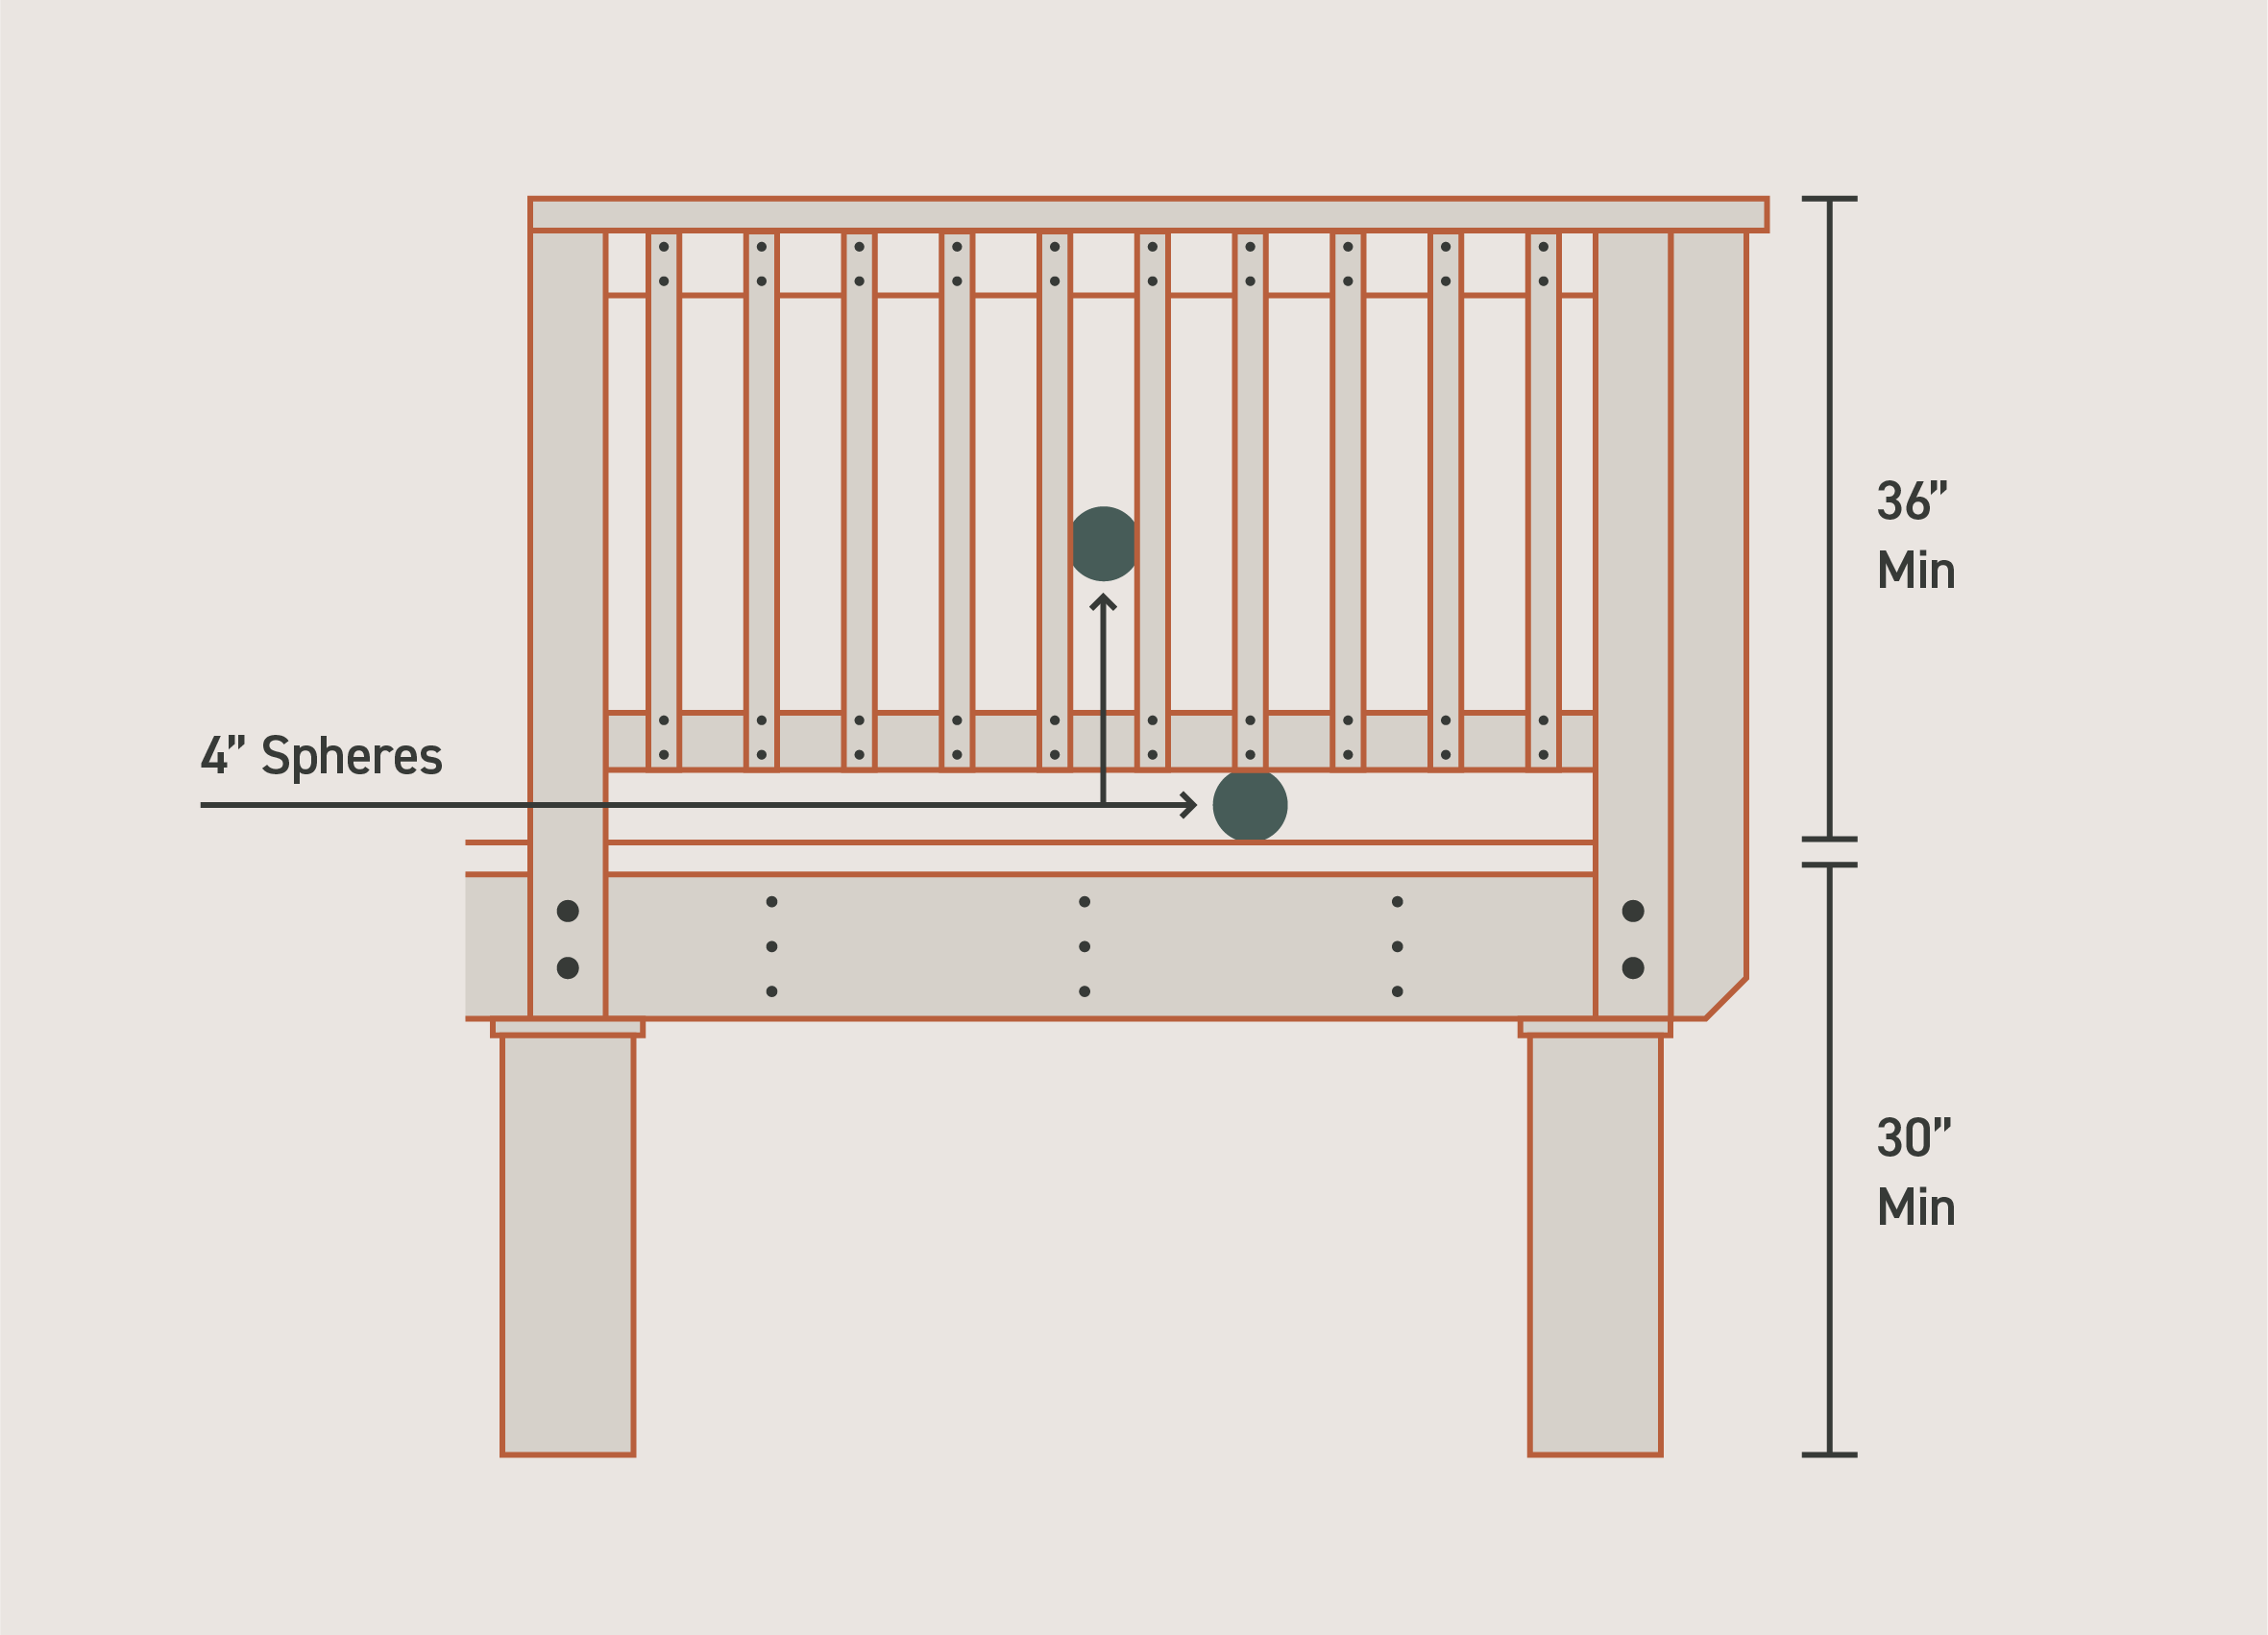
- Railing is required for decks 30” above the ground or taller in most areas—follow your local building code.
- Guardrails should be 36″ or taller, depending on your location.
- Baluster gaps must be less than 4″ wide
- Bottom rails must be less than 4″ above the deck surface, depending on local building requirements.
Otherwise, follow manufacturer guidelines for your deck accessories. Common additions include:
- Built-in lights.
- Built-in seating.
- Deck furniture.
- Kitchen features.
- Stair gates.
Sloped Decking FAQ
There are a few particular rules to know about building a stable deck on a slope. Explore common questions and guidelines below to ensure you’re ready to build.
How deep should a deck footing be on a slope?
Your deck footing depth depends on your location’s frost depth more than the slope itself. That said, you may need to increase your footing depth/height, or your post height/length as the slope increases.
Always check with local building codes and authorities for required footer depth and size.
What is the best deck for a sloped backyard?
Multi-level decks are a good choice to make the most of your space and work with the property’s slope instead of against it. You can install your levels to match your yard’s slope and make the most of dedicated deck spaces.
Do you need a permit to build a deck on a slope?
Yes, you’ll likely need a permit to build a deck on a slope. Attached decks almost always need a permit, but it’s a good idea to check your local building codes to confirm permitting needs.
Decks on uneven ground are nothing new. Installation has its challenges, but building a deck on a slight slope isn’t much harder than other decks. But if your deck design is especially complicated, or the slope is steeper than 45 degrees, consider consulting a contractor for help.
Feeling confident you can build a deck on a slope? Use our deck designer to plan your dream deck and begin your next favorite home improvement project.