Installing composite decking over wood boards may seem like a good idea, but this plan has serious issues. Instead, it’s best to remove the wood boards first, and install the composite deck boards directly onto the existing wooden substructure.
Need More Installation Guidance? Read through best practices for installing composite decking, so you can be sure to kick off your project right.
LEARN ABOUT INSTALLING COMPOSITE DECKING
What to Do: Remove the Wood Boards
Install TimberTech composite deck boards over the wood substructure after removing the wood deck boards.
Benefits of this approach include:
- Moisture-resistant composite decking means no need to worry about mold, mildew, or rot.
- The weight of composite deck boards alone will not put a strain on your deck’s foundation.
- One layer of decking means level transition points at your home’s entry way to the deck or at the stairs.
What Not to Do: Install Over Wood Boards
Do not install composite deck boards on top of wood deck boards for the following reasons:
- Water will seep in between the two boards and cause the wood deck boards to rot and deteriorate in time.
- The weight of composite deck boards on top of the wood deck boards may be too great for the substructure to safely hold.
- Installing composite decking over wood boards would raise the deck height by an inch or so, creating a tripping hazard.
The Takeaway: Resurfacing your wood deck by installing composite decking — after removing the wood deck boards — is the best way forward if you want a long-lasting, secure, and beautiful deck.
Follow these best practices for installing composite decking over wood substructures to ensure your deck is built to last.
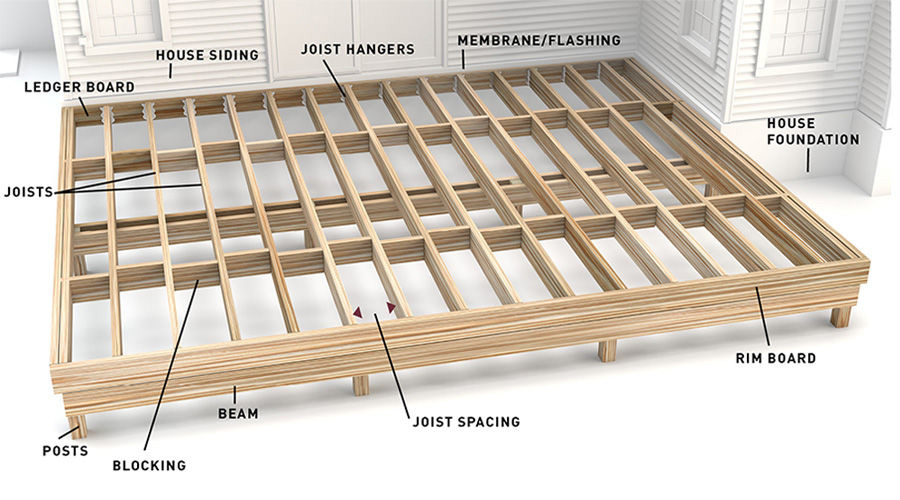
Before You Begin: Inspect Your Deck & Substructure
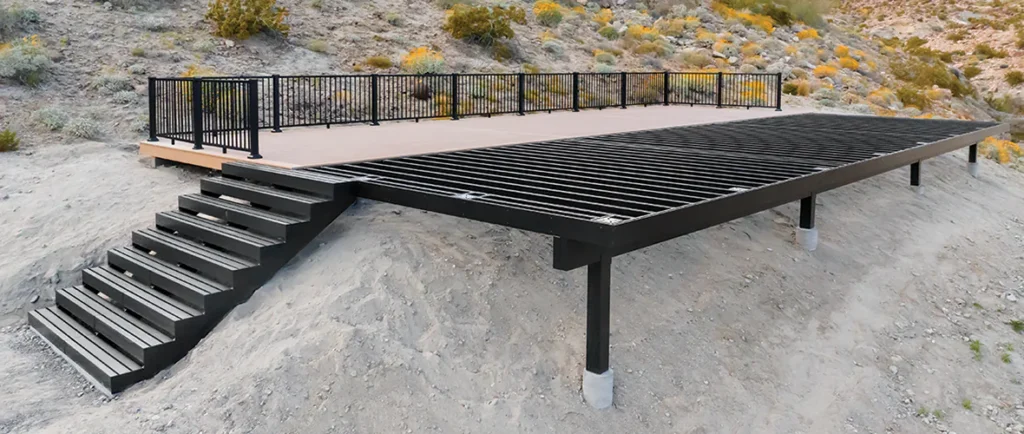
Before you begin installing composite decking over the wood substructure, perform an inspection of your deck and substructure. If your deck substructure has any serious problems that can’t be repaired, you may need to build a brand-new substructure.
What to Look For

Deck Surface Problems
Surface problems can often indicate problems with the substructure below.
Deck surface problems to look for:
- Cracking and splintering.
- Rusted nails.
- Warped boards.
- Discoloration (greenish tint could be mold and mildew while black means rot).

Pooling & Drainage Issues
While standing water won’t harm your composite boards, it can have a detrimental effect on the wooden substructure.
Pooling and drainage issues to look for:
- Areas on the deck’s surface where water may be pooling.
- Areas around the deck’s perimeter where the ground is soft and soggy.

Substructure Problems, if Visible
Examine the joists and substructure under a second-story deck, or else remove the surface boards during your inspection.
Substructure problems to look for:
- Ledger board pulling away from the house.
- Mold, mildew, or rotting in any part of the frame.
- Loose joists or blocking.
- Rusted fasteners.
Want More Install Best Practices?
Visit our Deck Building Resource Center for tips, tricks, & guided videos.
Note: If you have questions or concerns about your deck substructure, partner with a contractor in your area to ensure your substructure is in good condition.
Resurface Your Traditional Wood Deck With TimberTech® Decking
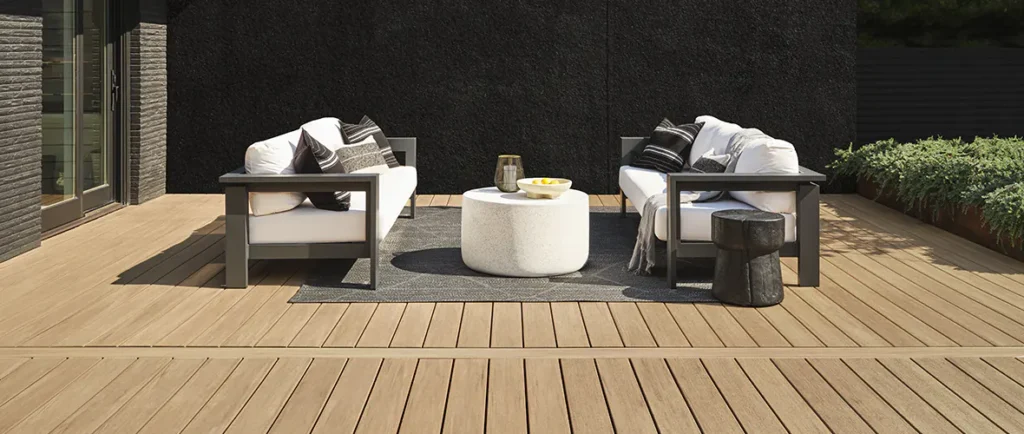
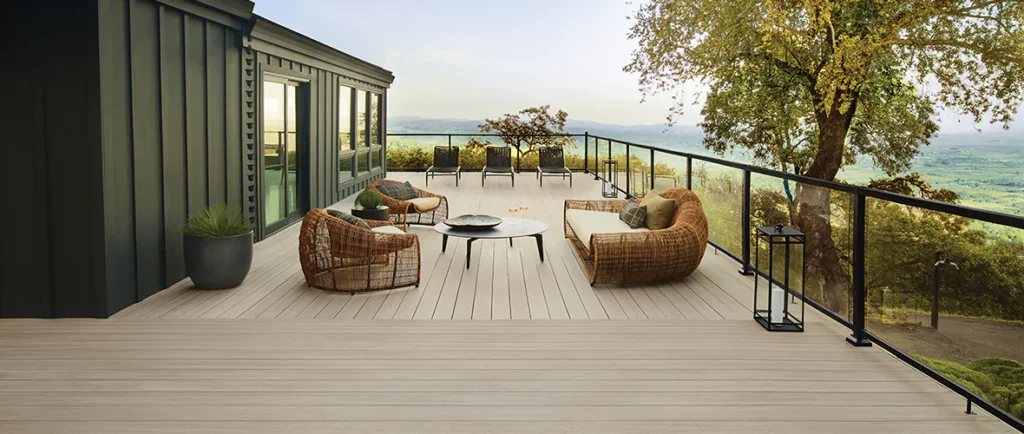
Resurfacing your traditional wood deck with TimberTech® capped polymer or capped composite decking will improve your outdoor living space both aesthetically and structurally. Our deck boards are made with advanced materials science and backed by industry-leading warranties, so you can enjoy your deck worry-free for many more years to come.
Follow these steps for resurfacing your deck:
Step 1: Choose Your TimberTech Deck Boards
Choose your preferred decking line, collection, and color. All our deck boards are made with nature-inspired aesthetics and designed to last for decades. Within our decking lines are nuances in appearance, performance, and cost, so you can find just the right deck board that works for you.

TimberTech AZEK®
- Capped polymer decking.
- Made with the most advanced synthetic materials technology.
- Unbeatable mold and mildew resistance.
- Advanced design options with Multi-Width Decking.
- Sophisticated colors and textures across two collections.

TimberTech PRO®
- 4-sided capped composite decking.
- Fully synthetic cap locks out moisture on all sides.
- Features Mold Guard® Technology for serious protection.
- Dense composite core offers premium durability.
- Varied colors and textures across three collections.

TimberTech EDGE®
- 3-sided capped composite decking.
- Attainable and attractive.
- Fully synthetic cap locks out moisture on three sides.
- Scalloped board profile offers lighter boards without sacrificing durability.
- Solid and color-blended options across two collections.
Step 2: Remove Your Current Deck’s Wood Deck Boards
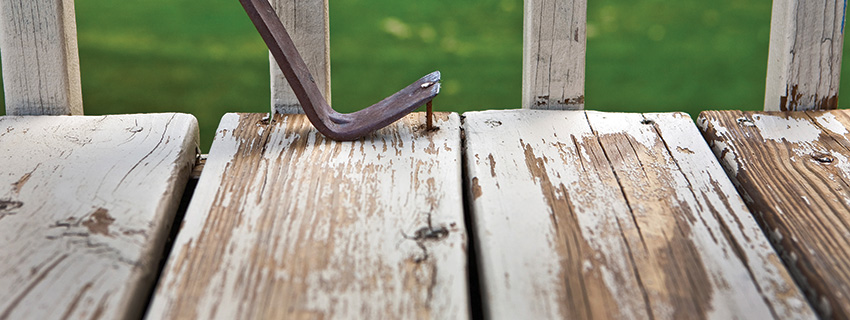
When removing the wooden deck boards, use caution when pulling out nails and fasteners – wear gloves and protect your eyes from dust and wood particles with safety goggles.
Step 3: Perform an In-Depth Inspection of Your Substructure
After your remove the wooden deck boards, perform an in-depth inspection of your substructure.
Be sure to check:
- That all joists, blocking, and beams are in-plane, securely fastened, and correctly spaced.
- That the ledger board is flush with the house and secured with the appropriate fasteners.
- For signs of mold, mildew, and rot that weren’t visible from the surface.
Step 4: Install Your Composite Deck Boards on Your Existing Substructure
Installing composite decking over a wood substructure requires the proper composite decking fasteners. The fasteners you can choose depends on:
- Your chosen decking line.
- The chosen collection within the decking line.
- The board profile.
Once you have your fasteners, you’re ready to begin installing composite decking over the wood substructure. For straightforward installation guidance on common deck board and fastener pairings, go with one of the following:

TimberTech AZEK® and TOPLoc®
TOPLoc fasteners are top-down fasteners that are color-matched to your deck boards, for a blended-in look.

TimberTech AZEK® and Cortex®
Cortex screws are top-down fasteners hidden with plugs made from TimberTech deck boards. The result is a clean, fastener-free surface.

TimberTech PRO® and ConceaLoc®
CONCEALoc hidden fasteners are installed between grooved boards with collated screws and give you a fastener-free surface.
Be sure to review the installation guidelines for your preferred decking line and chosen fasteners to ensure correct installation. You can also find expert guidance, how-to videos, and downloadable project guides in the Deck Building Resource Center.
Have any questions about installing composite decking over wood? Partner with a TimberTech-registered contractor who can offer their expertise at every step of your resurfacing project.
See & Feel the TimberTech Advantage
Our capped polymer and capped composite decking lines combine recycled material with all the beauty of traditional wood.