So, you’re interested in using composite decking for your deck build thanks to its low-maintenance, high-performance material composition — but where to start with installation? Luckily, installing composite decking can be a lot like installing wood.
Ways Installing Composite Deck Boards Is Similar to Traditional Wood Installation
✓ When laid in a straight pattern, composite decking uses the same standard joist spacing (16” on center) as wood.
✓ Composite decking can be cut using the same tools for wood (miter saw and/or jig saw).
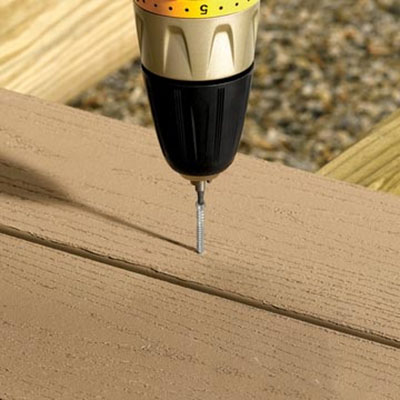
✓ Composite decking can be installed with top-down fasteners, a common choice for wood decking.
Note that there are a few key differences between installing composite decking vs wood (which we’ll cover later on).
LOOKING FOR PROJECT STEPS TO GUIDE YOUR BUILD?
Explore our Deck Building Resource Center for easy-to-follow process tips and install best practices. VISIT THE DECK BUILDING RESOURCE CENTER
Explore the tips below to get the insight you need for your composite deck build.
1. Make Sure You Have the Right Tools for the Job
Installing composite decking correctly requires you to have the right tools, most of which are the same used for a wood deck build. If you don’t own one or more of these, you can likely purchase or rent them from your local hardware store.
| ✓ Safety glasses | ✓ Fasteners for your substructure and decking |
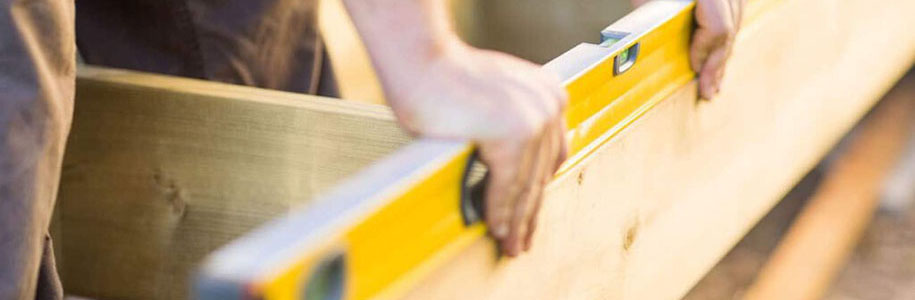
| ✓ String line (to check that joists and blocking are level and in plane across the tops) | ✓ Miter saw and/or jig saw |
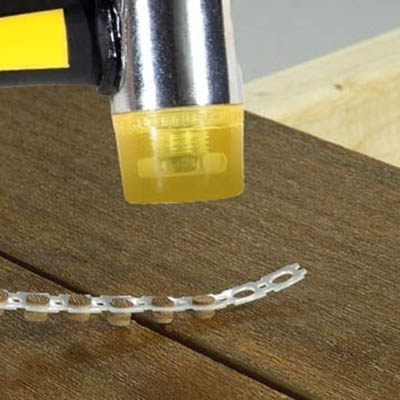
| ✓ Hammer or mallet | ✓ Flashing and joist tape to protect your substructure |
| ✓ Drill |
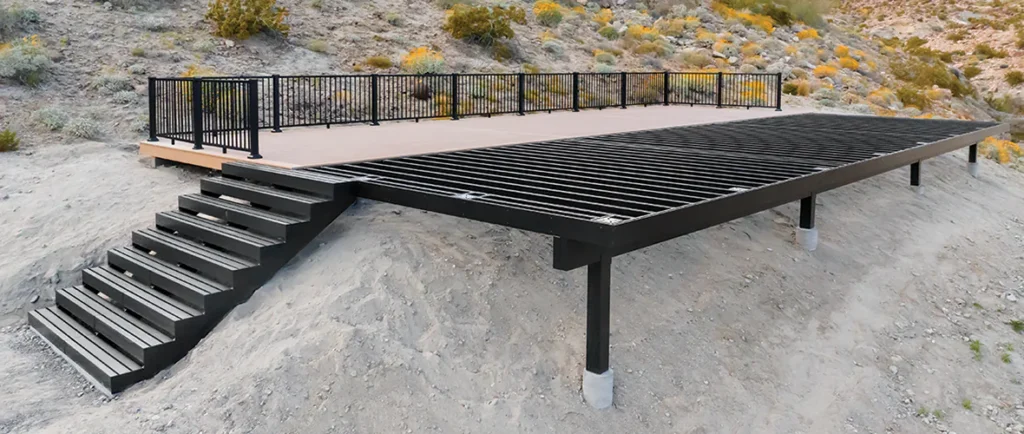
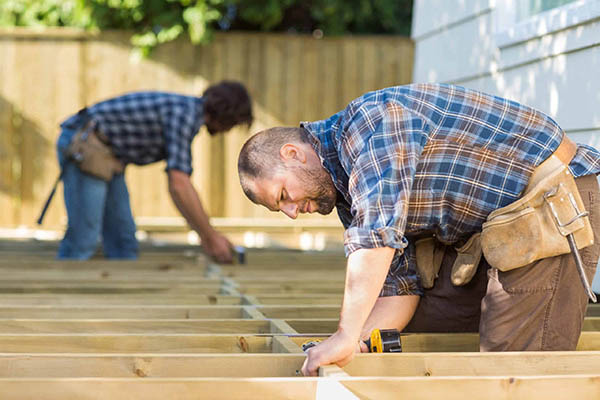
2. Ensure You Have a Sturdy Substructure

Installing composite decking requires your deck have a properly installed (and maintained) substructure for lasting structural integrity. Consider the scope of your project and your deck’s substructure before getting started.
The scope of your deck project will likely fall into one of two categories:
- Building a new substructure
- Using an existing substructure
CONSIDERING EXTENDING YOUR DECK?
We recommend a full resurfacing. Learn more about extending a deck.
Building a New Substructure
If you’re installing composite decking, starting with a brand new substructure is the best path to take in most cases, unless your existing substructure is only a few years old and in mint condition.
A new substructure, when built correctly, ensures your new deck is safe, sturdy, and will last for many years to come.
Tips for Building a New Substructure
✓ Use frost-proof footings to set your posts in if you live in a cold or four-seasons climate.
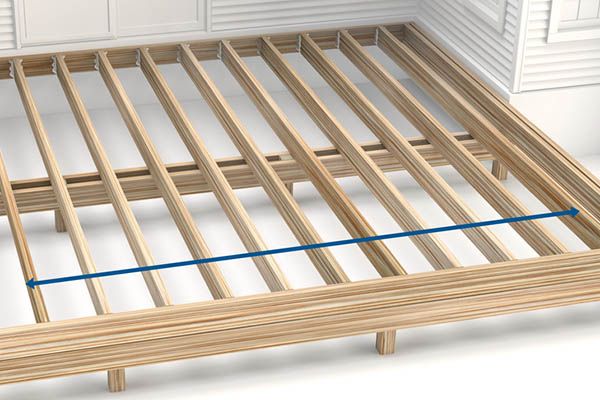
✓ Ensure proper deck joist spacing, making sure joists are level and in plane across the tops.
✓ Properly attach the ledger board (the board that connects your deck to your home) with the appropriate screws.
Using an Existing Substructure
If your deck substructure is in good condition, you can consider a resurfacing job, where you maintain your substructure and only replace your existing deck boards. However, you’ll need to ensure your substructure is healthy enough to last for the long haul with a thorough deck inspection.
Since you’ll be installing composite decking, you should remove your existing deck surface boards to get a good look at the substructure.
Checking For a Healthy Substructure
A substructure that’s a good candidate for a resurfacing job will:
✓ Be free of mold, mildew, and rot.
✓ Feature securely connected members (joists, blocking, ledger board, etc.) with the appropriate fasteners.
✓ Have proper joist spacing and blocking, with all members level and in plane across the tops.
Deck Repair vs Replacement
Minor issues with your substructure, such as a few loose fasteners or a damaged joist or two, can likely be repaired.
However, more severe issues that affect your deck’s structural integrity, such as any rot in the ledger or posts, will likely warrant a full deck replacement.
DO NOT INSTALL COMPOSITE DECKING DIRECTLY OVER WOOD BOARDS
Doing so can cause serious issues for your overall deck structure. Learn more about installing composite decking over an existing deck.
3. Protect Your Substructure With Joist Tape
Since your substructure is likely made with traditional lumber, it is vulnerable to moisture damage over time. Once you’ve built your new substructure, or made the appropriate repairs to an existing one, you’re ready to optimize for long-term performance.
Minimize Moisture Damage With Joist Tape
Appy TimberTech PRO-Tac™ Flashing and Joist Tape to the tops of your joists and ledger board to minimize the likelihood of moisture-related issues. The butyl adhesive creates a tight seal, locking out moisture and helping to prevent mold, mildew, and rot growth.
4. Considerations Before Installing Composite Deck Boards
Now that your substructure is protected, it’s time to prep for installing your composite deck board installation. For premium results — and no surprises — familiarize yourself with these key facts about installing composite deck boards.
Understand Deck Board
Expansion & Contraction
Composite decking expands and contracts across its length with changes in temperature (rather than across its width like wood). To limit changes in length, cut your TimberTech deck boards right before installation.
Avoid Excessive
Construction Debris
Excessive debris build-up such as dirt, sand, and dust from construction can become difficult to remove — and may damage your boards — if not cleaned right away. Minimize debris by installing composite deck boards at the end of your backyard renovation project.
Avoid Excessive
Heat
TimberTech decking should be kept away from heat sources, including sunlight reflected from energy-efficient window products, like low-emissivity (Low-E) windows, which can cause excessive heat build-up that damages your boards.
Be Aware of Metamerism
Metamerism refers to the phenomenon where two of the same boards appear to be two different shades under a certain light source or at a certain angle (think the “stripe” effect from grass mowed one direction and then the other). Metamerism is perceptual, and not a defect.
Be Aware of the Potential for Static Electricity
Although uncommon, the buildup and generation of static electricity is a naturally occurring phenomenon in many plastic-based products including composite deck boards, including TimberTech, and is not a defect.
Best Practices for Installing Composite Deck Boards By Fastener Type
The process for installing composite decking will vary depending on the type of board and fastener you’re using.
Composite decking fasteners are typically either:
- Top-down fasteners (similar to those used in traditional wood decking installation)
- Hidden clip fasteners (used with grooved composite deck boards)
IMPORTANT
Always consult the installation guide for your chosen deck board and fastener type before breaking ground on your project. READ INSTALL GUIDES
Installation With Top-Down Fasteners
Installing composite decking with top-down fasteners shares many of the same best practices as traditional wood installation. Top-down fasteners offer both visible and hidden options.
WANT THE EASIEST WAY TO BUILD A DECK?
Choose TimberTech Advanced PVC decking with top-down fasteners. Learn more about the easiest way to build a deck.
Installation With Hidden Clip Fasteners
Hidden clip fasteners are compatible with grooved composite deck boards. These fasteners secure your boards from the sides, without being visible from the surface.
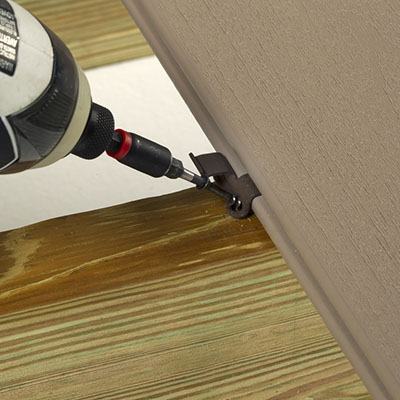
TimberTech PRO® & EDGE® With CONCEALoc®
CONCEALoc hidden clip fasteners are installed between grooved composite deck boards.
✓ No pre-drilling required
✓ Consistent 3/16” deck board spacing
✓ Boards clip into adjoining board for easy installation
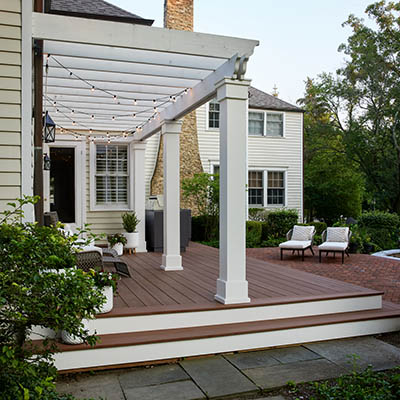
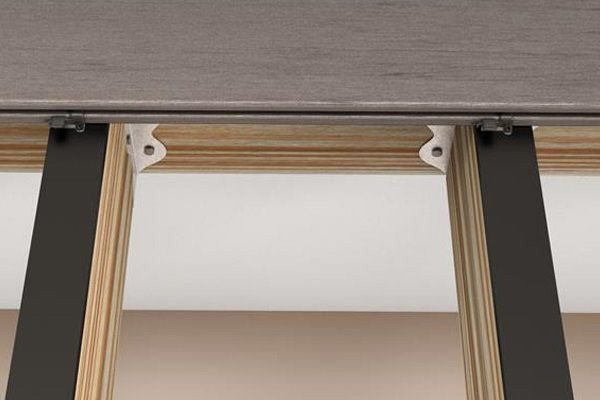
6. Give Your Deck a Finished Look With Fascia
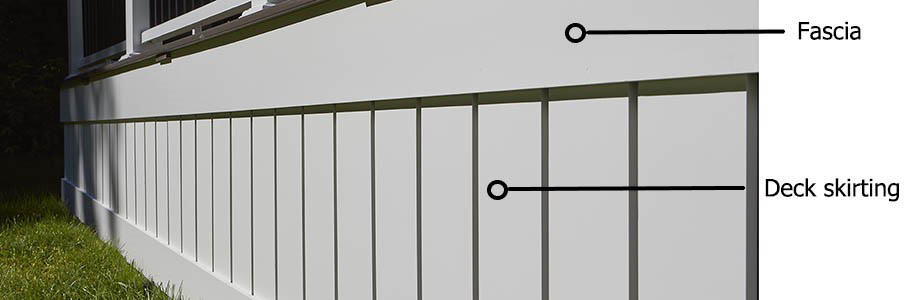
Fascia refers to the boards that run along the perimeter of your deck, covering the rim joists. Fascia gives your deck a sleek, seamless finish.
Deck skirting, while closely related to fascia, is distinct, and covers the opening between the deck surface and the ground.
How to go about installing composite decking fascia boards will depend on your application.
There are two primary ways to apply fascia trim:
- Flush with your deck surface, which covers the ends of your deck boards for a clean finish.
- Just below your deck surface boards (pictured above), which is typical if you’re using a picture frame border.
Get more installation tips by watching our fascia installation video.
RATHER HAVE SOME HELP?
Partner with a TimberTech-registered contractor to ensure your project gets done right. FIND A CONTRACTOR
7. Learn How to Make Your Build Easier
Now that you know the best practices for installing composite decking, it’s time to start thinking about your deck design. Some designs are more complicated to install than others, so keep things simple with these tips.
Deck Design Tips
✓ Keep the guesswork out of your build by choosing the deck board and fastener combination you’re most familiar with.
✓ Utilize standard joist spacing and blocking by laying your boards straight (as opposed to using a deck board pattern).
Deck Layout Tips
✓ If you’re building a new substructure, keep your build straightforward by sticking to simple shapes like squares and rectangles.
✓ Cut down on your workload, not your deck boards, by choosing a deck size that’s equivalent to your chosen board length (standard TimberTech board lengths include 12’, 16’, or 20’, depending on color and board width selected).
8. Get More Resources for Installing Composite Deck Boards
Feeling confident about kicking off your project? Get more DIY guidance on installing composite decking in our Deck Building Resource Center. Explore step-by-step installations, watch helpful install videos, discover ideas for finishing touches for your space, and more.
Get the DIY Insight to Do Your Project Right
Dive into our Deck Building Resource Center for easy-to-follow tips, guided install videos, and more.